
Most sump pumps that stop working are fixed by checking three things in order: power, the float switch, and clogs in the intake or discharge line. Test those first and always cut power to the unit before reaching into the pit. If all three check out and the pump still won’t run, you’re likely looking at a burned-out motor or a failed switch assembly, and that’s usually a job for a professional.
TL;DR:
- Power issues are the most common cause of sump pump failure and should be diagnosed by testing outlets, circuit breakers, and GFCIs before inspecting the pump itself.
- Float switch problems, often caused by jamming or switch failure, are the second most frequent failure and require gentle freeing of the float or switch replacement.
- Clogs or debris in the intake or impeller can stall the pump despite proper power, so cleaning these parts is an essential step during troubleshooting.
- A motor that hums but doesn’t move water, or produces grinding or burnt smells during a short dry run, indicates potential motor or bearing failure requiring professional repair.
- Regular testing of backup batteries under load every six months and staged replacement after five to ten years extend the pump’s reliability during emergencies.
Table of Contents
- Ordered diagnostic checklist and tools
- Step-by-step fixes for each common failure mode
- Backups, battery testing under load, and emergency options
- Deciding whether to repair or replace
- Seasonal maintenance schedule and exactly how to test the pump
- Foundation RESQ’s practical guidance and when to call a pro
- What homeowners get wrong about sump pump troubleshooting
- How Foundation RESQ can help you fix it for good
- Sources
- FAQ
Ordered diagnostic checklist and tools
Work through these checks in sequence rather than jumping around. Each one rules out a common cause before you move to something more involved.
- Confirm power is reaching the unit. Check that the pump is plugged in, the outlet isn’t dead, the breaker hasn’t tripped, and any GFCI hasn’t kicked off.
- Look inside the pit. Shine a flashlight in and check for debris, grit, an unusual odor, or a water level that seems too high or too low for normal operation.
- Test the float switch. Lift the float by hand. The pump should kick on immediately; if it doesn’t, the switch or its wiring is suspect.
- Trace the discharge path. Follow the pipe outside and check the exit point for ice, debris, or a jammed check valve that’s blocking flow.
- Watch for motor red flags. Grinding noises, a burnt smell, or a pump that hums but doesn’t move water points toward motor or bearing failure.
Before any of this, follow the priority order that NDSU Extension recommends: verify power first, inspect the pit and intake for debris second, then manually lift the float to see if the pump responds. Disconnect power before you remove or clean the unit, since reaching into a wet pit with the pump energized is a real shock hazard.
You’ll want a flashlight, insulated gloves, a basic voltmeter, and a bucket of water on hand for testing. Don’t force a jammed float with excessive pressure, and don’t skip the power disconnect step to save time.
Pro Tip: Keep a spare fuse or breaker handy for the pump circuit. A tripped breaker that resets and then trips again usually means a wiring fault, not a fluke.
Step-by-step fixes for each common failure mode
Power issues. Start with the simplest explanation. Test the outlet with another device, reset the breaker once, and check the GFCI if the pump is on a bathroom or garage circuit. If the breaker trips again immediately after reset, stop and call an electrician. Repeated tripping means a short or overloaded circuit, not something to force past.
Float switch problems. A jammed float is the most common reason a pump “does nothing” even though the pit is full. Gently free the float if it’s wedged against the pit wall or a pipe, and check that the cable has enough slack to travel its full range. If the float moves freely but the pump still doesn’t respond, the switch itself has likely failed and needs replacement rather than adjustment.
Clogs and dirty impellers. Debris in the intake screen or a jammed impeller will stall a pump that otherwise has power. Unplug the unit first, then lift it out of the pit and clear the intake screen and impeller housing by hand. Rinse away grit and check that the impeller spins freely before reconnecting power.
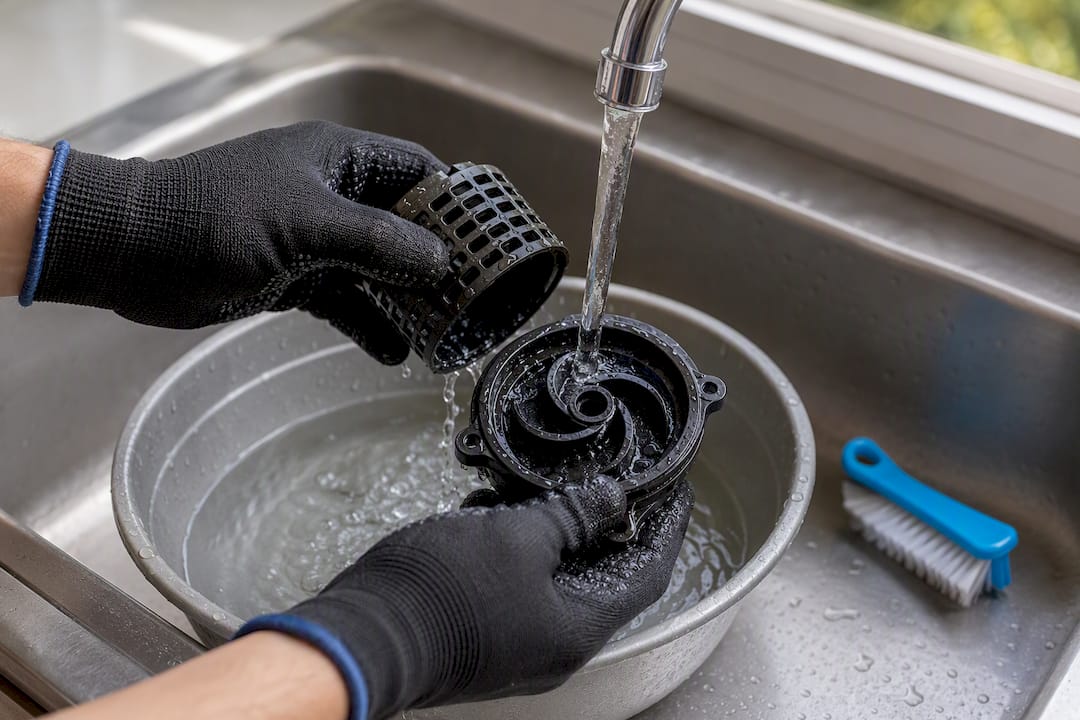
Discharge and check valve issues. A pump can run fine and still fail to move water if the discharge line is blocked. Check the outside outlet for ice buildup in cold weather or debris blocking the opening. A check valve that’s stuck or installed backward will cause water to flow back into the pit after each cycle, which shows up as a pump that seems to run constantly without lowering the water level.
Motor and impeller failure. If power, float, and discharge all check out, test the motor with a short dry run: activate the pump for no more than about 10 seconds and listen closely. This burst test is a standard way to check motor and switch response, but you should stop immediately if the pump sounds like it’s grinding gravel, since that indicates impeller damage or worn bearings. NDSU Extension notes that a thermal cutoff will typically reset after 15 to 30 minutes if the motor overheats during testing, so a pump that refuses to restart right after a dry run isn’t necessarily dead.
- Unplug the pump before handling it.
- Run the 10-second dry test only once you’ve confirmed float and power are working.
- If it grinds, smells burnt, or won’t restart after the cooldown window, treat it as a motor failure.
Temporary workarounds while you wait for repair. A wet vac can manage light water accumulation for a few hours. A portable pump powered by a generator or a car battery through an inverter can buy you time during a storm, but never run a generator indoors or in an attached garage, and disconnect any battery-powered backup before it fully drains to avoid damaging the battery.
Backups, battery testing under load, and emergency options
A battery backup, a generator, or a spare pump staged nearby are the three realistic ways to keep water out while your primary pump is down.
- Battery backups need testing under load, not just at rest, since a battery can read fine sitting idle and still collapse once the pump starts drawing current.
- Voltage should hold above a certain safe threshold while the pump is running, according to NDSU Extension, and batteries that fall below a critical voltage during operation should be replaced.
- A generator or a vehicle battery can power a portable pump in a pinch, but keep gas-powered generators outdoors and away from windows, and never let a car battery run down past the point where it can still start the vehicle.
- Staging a spare pump with matching fittings near the pit means a five-minute swap instead of an emergency call during the worst part of a storm.
Pro Tip: Test your backup battery every six months while the pump is actually running, not just with a multimeter on a resting battery. That’s the only way to catch a battery that’s already failing.
Deciding whether to repair or replace
Pump lifespan depends more on how often it’s cycled than on the calendar. A unit that runs constantly during a wet season wears out faster than one that sits idle most of the year. Some manufacturers suggest replacing the pump itself after several years of use and the switch or float assembly even more frequently, according to NDSU Agriculture Extension.
Replace now rather than repair if you see any of these:
- The motor trips its thermal cutoff repeatedly during normal operation, not just during a dry-run test.
- You hear grinding, or notice rusted, seized bearings when you inspect the unit.
- The pump runs but moves water noticeably slower than it used to under a normal load.
- It’s already past the manufacturer’s suggested replacement window and showing any other symptom on this list.
A single stuck float or a cleared clog is a reasonable repair. Recurring failures on an older unit usually aren’t worth chasing with more parts. If your pump is aging but still passes every test, buy an identical replacement now and keep it on-site. Extension guidance notes that having a spare ready cuts response time dramatically during heavy storms, when installers are hardest to reach. For a fuller breakdown of age thresholds and cost signals, see our guide on when to replace your sump pump.
Seasonal maintenance schedule and exactly how to test the pump
A pump that sits unused for months is more likely to fail exactly when you need it most, since inactivity contributes to seized bearings and switch corrosion. Test before your wet season starts, not after the first storm.
- Once a year, unplug the pump, pull it from the pit, and clean the intake screen and check valve of debris.
- Reconnect power and pour a bucket of water into the pit to confirm the pump activates and clears the water, a method FEMA recommends as the standard test.
- Run this test twice in a row to make sure the float resets properly between cycles.
- Every six months, test any backup battery under load rather than at rest, since a battery can pass a resting check and still fail once the pump draws power.
- Write down the pump’s model and serial number along with each test date, so a replacement or a warranty claim goes faster if the unit fails later.
FEMA also recommends replacing the pump outright if it’s over 10 years old or already showing failure signs during testing. For a closer look at what a full seasonal check should cover, see our guide on assessing sump pump performance.
Foundation RESQ’s practical guidance and when to call a pro
A working sump pump is one piece of a larger drainage and foundation system, which is why sump pump repair sits alongside basement waterproofing and crawl space work in Foundation RESQ’s service lineup. Some companies offer free inspections and financing options for homeowners weighing repair against replacement, and jobs are matched to the specific moisture or structural issue found on-site rather than sold as a one-size-fits-all package.
Call a professional when you run into:
- Repeated breaker trips or any sign of a wiring fault near the pump circuit.
- A pump that fails again within weeks of a DIY fix.
- Water intrusion around the foundation itself, not just in the pit.
- A discharge line that needs rerouting through finished space or under a foundation wall.
A professional inspection should cover the pit, pump, discharge routing, and any signs that water is reaching the foundation rather than just the sump basin. Ask about warranty terms on parts and labor, and request written documentation of what was found and repaired for your own records. For issues that go beyond the pump itself, our basement waterproofing services page covers broader moisture control options.
What homeowners get wrong about sump pump troubleshooting
The most common mistake I see is skipping the power disconnect step because the pit “doesn’t look that wet.” That’s exactly when a hand near a live pump becomes dangerous. The second is checking the primary pump obsessively while never testing the backup battery under load, so the backup fails at the exact moment it’s needed. Build a habit: test twice a year, log the date, and keep a spare pump ready if yours is aging.
— Kayle
How Foundation RESQ can help you fix it for good
If you’ve worked through the checklist above and your pump still won’t run reliably, a repair or a full swap is often faster and cheaper than fighting the same failure every storm season. Some companies handle sump pump repair, backup battery installation, and basement waterproofing as connected services, since a failing pump is frequently a symptom of a bigger drainage problem rather than a standalone issue.

- Sump pump repair for units that fail power, float, clog, or motor checks.
- Battery backup installation for homes that need a second layer of protection during outages.
- Basement waterproofing when pump failures keep recurring because of an underlying moisture issue.
A free inspection covers the pump, the pit, discharge routing, and any signs of water reaching your foundation, and financing options are available for larger repairs. Visit our sump pump repair services page to schedule an inspection and get a clear plan before the next storm hits.
Sources
- Now is the time to check your sump pump — NDSU Extension
- Electric backup sump pumps for houses — NDSU Extension
FAQ
How do you reset your sump pump?
Unplug the pump, wait a minute, then plug it back in and check that the breaker hasn’t tripped. If it still won’t restart, lift the float by hand to confirm the switch responds before assuming a deeper fault.
How do I know if my sump pump is burnt out?
A burnt-out pump typically hums without moving water, gives off a burnt smell, or fails to restart after a short dry-run test even once it’s had time to cool. Grinding noises during operation also point to motor or bearing damage rather than a simple clog.
How many years does a sump pump usually last?
Lifespan depends more on how often the pump cycles than on age alone, but some manufacturers suggest replacing the pump around the five-year mark and the switch or float assembly roughly every two years, according to NDSU Agriculture Extension. Staging an identical replacement once a unit starts aging is a common precaution among installers.
What do you do if your sump pump fails?
Cut power to the pump before touching it, then work through power, float, and clog checks in order to find the cause. If water is rising and you don’t have a backup ready, a wet vac or a portable pump can hold the line until a permanent fix is in place.