
Most gaps between a window frame and the foundation under 1/4 inch seal fine with paintable acrylic-latex caulk, while gaps between 1/4 inch and 3 inches usually need backer rod plus polyurethane sealant or expanding foam. Anything wider than 1/2 inch, or a gap that keeps growing, points to foundation movement and needs an inspection instead of caulk. Poor window well drainage can turn even a small gap into a moisture problem, which is why groups like the Department of Energy and contractors such as Foundation RESQ treat sealing and drainage as one job, not two.
TL;DR:
- Gaps under 1/4 inch between the window frame and foundation typically only require acrylic-latex caulk, which can last several years and costs under a dollar per tube.
- Gaps from 1/4 inch to 3 inches need a backer rod and exterior-grade sealant, with wider gaps over 1/2 inch indicating possible foundation movement and requiring professional inspection.
- Widening gaps, diagonal cracks, or repeated water intrusion suggest underlying foundation problems rather than simple weathering, necessitating a thorough assessment.
- Proper drainage around window wells and grading is critical to prevent trapped water from compromising sealed gaps and causing moisture issues.
- A free inspection from Foundation RESQ can identify whether sealing, drainage, or foundation repair is needed for persistent or wide gaps.
Table of Contents
- How to inspect and measure gaps between the window frame and foundation
- Step-by-step DIY fixes by gap size and location
- Why window wells and drainage matter for gaps
- Red flags and the inspection path: when gaps signal foundation trouble
- Practical perspective from Foundation RESQ: common mistakes and durable fixes
- What this guide gets right that most advice skips
- How Foundation RESQ can help with inspection and repair
- Sources
- FAQ
How to inspect and measure gaps between the window frame and foundation
Before buying any sealant, spend fifteen minutes actually looking at the gap. A few minutes of inspection tells you whether you are dealing with a cosmetic fix or something structural.
- Check for diagonal or V-shaped cracks running from the window corner into the foundation, along with separated paint or trim that has started to rot.
- Open and close the window or nearby door to see if it binds, sticks, or no longer latches the way it used to.
- Measure the gap with a tape measure or feeler gauge, noting the width at several points and whether it is wider at one end than the other.
- Run a flashlight along the gap at night or do a simple paper test (hold a strip of paper in the gap and see if it flutters) to confirm air is moving through.
- Mark the ends of the gap with a pencil and photograph it with a ruler in frame, then recheck in a month to see if it has grown.
Gaps that stay the same size over several weeks are usually safe to treat as sealing jobs. Gaps that widen, or that line up with a diagonal crack, belong in the next category: something to monitor closely and likely hand off to a professional.
Step-by-step DIY fixes by gap size and location
Once you know the width, the repair almost picks itself. Building America guidance breaks these repairs into size bands, and it is worth following that logic rather than grabbing whatever tube of caulk is already in the garage.
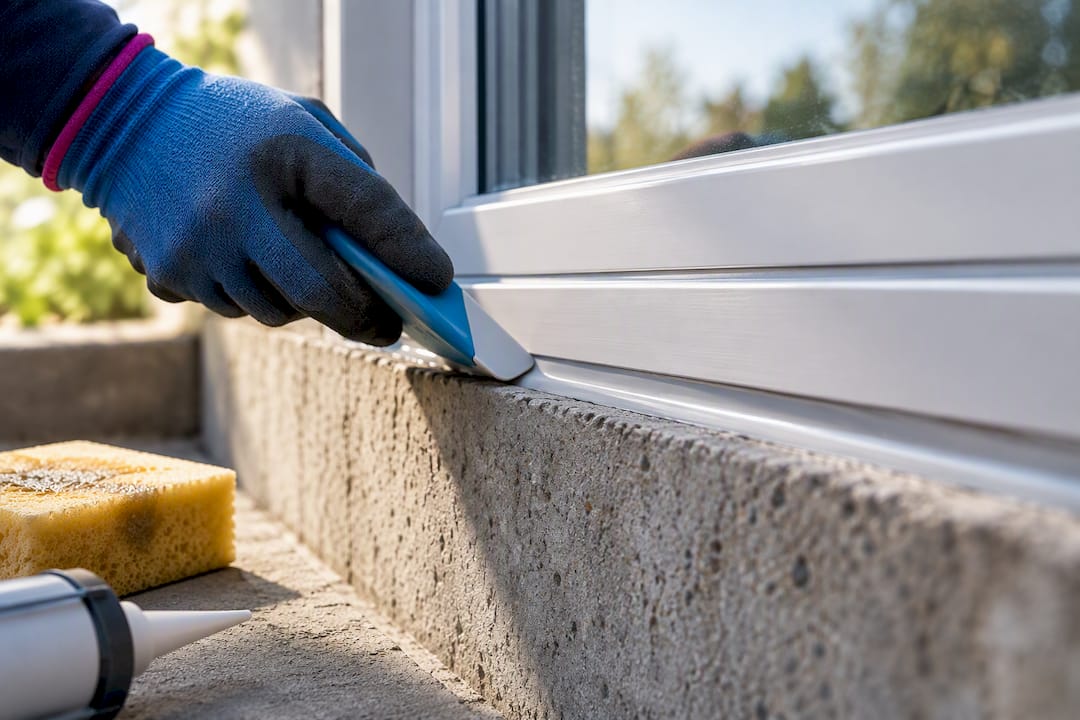
- Gaps under 1/4 inch: Clean the joint, let it dry, then apply a paintable acrylic-latex caulk in a continuous bead and smooth it with a wet finger or tool before it skins over. This kind of seal typically holds for several years and costs the price of a single caulk tube.
- Gaps from 1/4 inch to 3 inches: Push a foam backer rod into the gap first, then cover it with an exterior-grade polyurethane or siliconized sealant so the sealant has something to bond to instead of sagging into open space. Where the gap is behind trim rather than exposed, a low-expansion spray foam adds insulation value without pushing the frame out of square.
- Gaps over 1/2 inch, or gaps that change shape over time: Skip the caulk. Sealing a gap this wide with caulk alone tends to trap moisture behind the bead instead of keeping it out, and it does nothing for whatever is causing the movement. These need trim or frame repair, sometimes paired with foundation work.
Work in dry, moderate weather when possible: most caulks and foams cure poorly below 40 degrees Fahrenheit or on damp substrates, so wipe down wet surfaces and check the product label for its minimum application temperature. Avoid overfilling the joint since excess sealant just cracks and peels sooner. A small tube of caulk and a bag of backer rod cost well under $20 combined, and a straightforward gap can be sealed in under an hour once the surface is prepped and dry.
Pro Tip: Tool the bead immediately after applying it. A smooth, slightly concave finish sheds water better than a flat or bulging one and lasts longer in the weather.
Why window wells and drainage matter for gaps
A window well that does not drain properly pushes water straight at the sill, and that water finds every seam a gap has to offer. Even a well-sealed joint eventually fails if it sits behind a well that fills like a bucket after every storm.
- Check the well top against the surrounding grade: it should sit a few inches above ground level so surface water runs away from the window, not into it, per University of Minnesota Extension guidance.
- Look for a gravel base and a drain connection at the bottom of the well rather than bare soil, which holds water against the foundation instead of moving it away.
- Clear leaves, mulch, and debris that have piled up in the well, since blocked drainage is one of the most common reasons a well backs up.
- Add a clear plastic cover if the well is regularly catching rain and debris, which cuts down on both water intrusion and cleaning.
If the well lacks a drain line entirely, or the drain has disconnected from the foundation footing, that is a job for a contractor rather than a bag of gravel. Wells used as an egress exit from a basement also have to meet minimum size and drainage standards under the IRC, so a well that looks small or shallow may not be up to code in the first place.
Red flags and the inspection path: when gaps signal foundation trouble
Some signs mean the gap is a symptom, not the problem. Recognizing them early keeps a manageable repair from turning into a bigger one.
- Diagonal or V-shaped cracks at the corner where the window meets the foundation, especially if they widen over a season.
- Doors and windows that bind or stop latching even after you have adjusted hardware, which often points to the frame shifting rather than swelling wood.
- A gap that keeps growing month over month despite stable weather, rather than settling into a fixed width.
- Active water intrusion at the sill or in the well even after drainage fixes, or a floor that visibly slopes near the window.
A professional inspection typically involves a visual survey of cracks and gaps, sighting the foundation for level, and sometimes setting up a monitoring plan before recommending a fix, whether that is sealing, waterproofing, or foundation stabilization. Photograph the gap with a ruler for scale, date the photos, and keep a short written log of when you first noticed it. That record helps a contractor diagnose faster and can matter if you ever file an insurance or warranty claim.
Practical perspective from Foundation RESQ: common mistakes and durable fixes
The most common mistake homeowners make is filling a foundation gap with soil, which does not address the shrinkage that opened it and can direct water down the wall instead of away from it. The better move, when the gap is soil-related rather than structural, is keeping the soil around the foundation evenly moist rather than packing dirt into the crack. Overcaulking a wide gap is the second common error: it looks finished but seals in moisture that then has nowhere to go.
A gap is rarely just a gap. It is usually the visible end of a drainage problem, a settlement problem, or both.
Contractors typically pair sealing with window-well rework, basement waterproofing, or concrete leveling when the underlying cause is water or movement rather than simple weathering. Repair plans should be built around pairing sealing with drainage or foundation solutions, matching the fix to the soil and moisture conditions found during an inspection rather than applying one solution to every job.
What this guide gets right that most advice skips
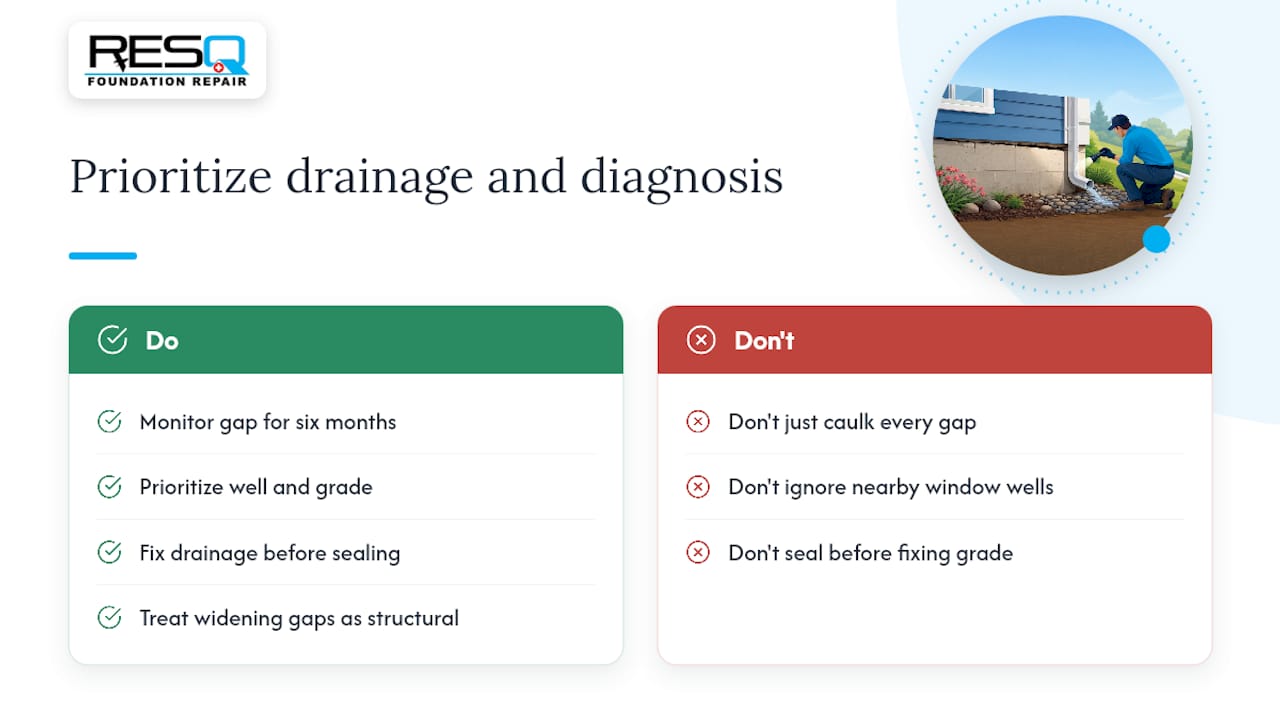
Most articles on this topic treat every gap the same way: caulk it and move on. That advice works for a hairline seam and fails everywhere else, because it ignores what the width and behavior of the gap are actually telling you. A gap that has not changed in six months is a maintenance item. A gap that is widening, or lines up with a diagonal crack in the foundation wall, is a different problem wearing the same disguise.
The other thing conventional advice underrates is drainage. Homeowners fixate on the caulk and ignore the window well sitting a few inches away, even though a well that traps water will undo a fresh seal within a season. If you take one thing from this guide, prioritize the well and the grade around it before you worry about which sealant to buy. Sealing is the easy fifteen percent of the job. Getting water to move away from the house in the first place is the part that actually protects the foundation.
— Kayle
How Foundation RESQ can help with inspection and repair
If a gap near your window keeps coming back, or you’re not sure whether it is drainage, settlement, or both, a trained eye can save you from guessing. A free inspection can look at the window, the well, and the surrounding foundation together, then build a plan around the actual cause rather than a one-size-fix.

- Foundation and structural repair for gaps tied to settlement or movement rather than simple weathering.
- Window well construction and drainage repair for wells that are funneling water instead of moving it away.
- Basement waterproofing for cases where the gap is one symptom of a larger moisture path.
Financing options are available for larger repairs, and scheduling starts with the same free inspection. Visit the services page to see current offerings or request an inspection.
Sources
For homeowners who want to check the original guidance, the Building America air sealing guide covers technique and thresholds, the DOE air sealing guide covers energy impact, and the IRC egress code reference covers window well sizing and drainage requirements.
- Air seal and insulate window rough openings (Building America / PNNL)
- Air sealing guide (U.S. Department of Energy)
- Moisture in basements: causes and solutions (University of Minnesota Extension)
FAQ
How can I close the gap between my window well and the foundation?
Clear debris from the well, add washed gravel at the base if it is missing, and confirm the well top sits a few inches above the surrounding grade so water drains away rather than pooling against the foundation, following University of Minnesota Extension guidance. If the well lacks a drain connection to the foundation footing, that reconnection is best left to a contractor.
How can I fix gaps in my windows?
For gaps under 1/4 inch, clean the joint and apply paintable acrylic-latex caulk in a smooth bead. For gaps between 1/4 inch and 3 inches, insert a foam backer rod first, then seal over it with an exterior-grade polyurethane or siliconized sealant.
How do I fix gaps at the foundation?
Small, stable gaps along the foundation line can often be sealed the same way as window gaps, with backer rod and sealant for anything wider than a hairline crack. Gaps that are widening or diagonal usually mean foundation movement, which needs a professional inspection rather than a sealant fix.
Why is there a gap between my house and the ground?
This is often soil shrinkage during dry periods pulling away from the foundation, which is a moisture issue rather than a structural failure. Filling the gap with soil is not the recommended fix; keeping the surrounding soil evenly watered during dry spells is the better approach.
What does Foundation RESQ charge for a window gap or foundation inspection?
Foundation RESQ’s inspection and repair pricing is not published online and is provided after a free, in-person assessment of the specific issue. Details on scheduling and available services are listed on the services page.