
An encapsulated crawl space is defined as a fully sealed, climate-controlled environment beneath your home that blocks ground moisture, outside air, and humidity from entering your living space. The crawl space encapsulation system uses heavy-duty vapor barriers, sealed foundation vents, perimeter insulation, and a mechanical dehumidifier working together as one integrated moisture control system. According to industry guidance, a properly installed encapsulation lasts 20–30 years and can reduce HVAC energy use by up to 20%. This guide explains every component, the real difference from a basic vapor barrier, and what homeowners need to know before investing.
What does encapsulated crawl space mean, exactly?
A crawl space is the shallow, unfinished area between the ground and your home’s first floor. It typically ranges from 18 inches to several feet in height. Without moisture control, that space becomes a breeding ground for mold, wood rot, and pest activity.
Encapsulation converts that raw space into a sealed, semi-conditioned environment. The process covers the ground and walls with a reinforced polyethylene liner, seals every vent and penetration, adds insulation to the perimeter walls, and installs a dehumidifier to maintain stable humidity. The result is a space that no longer exchanges air freely with the outdoors.
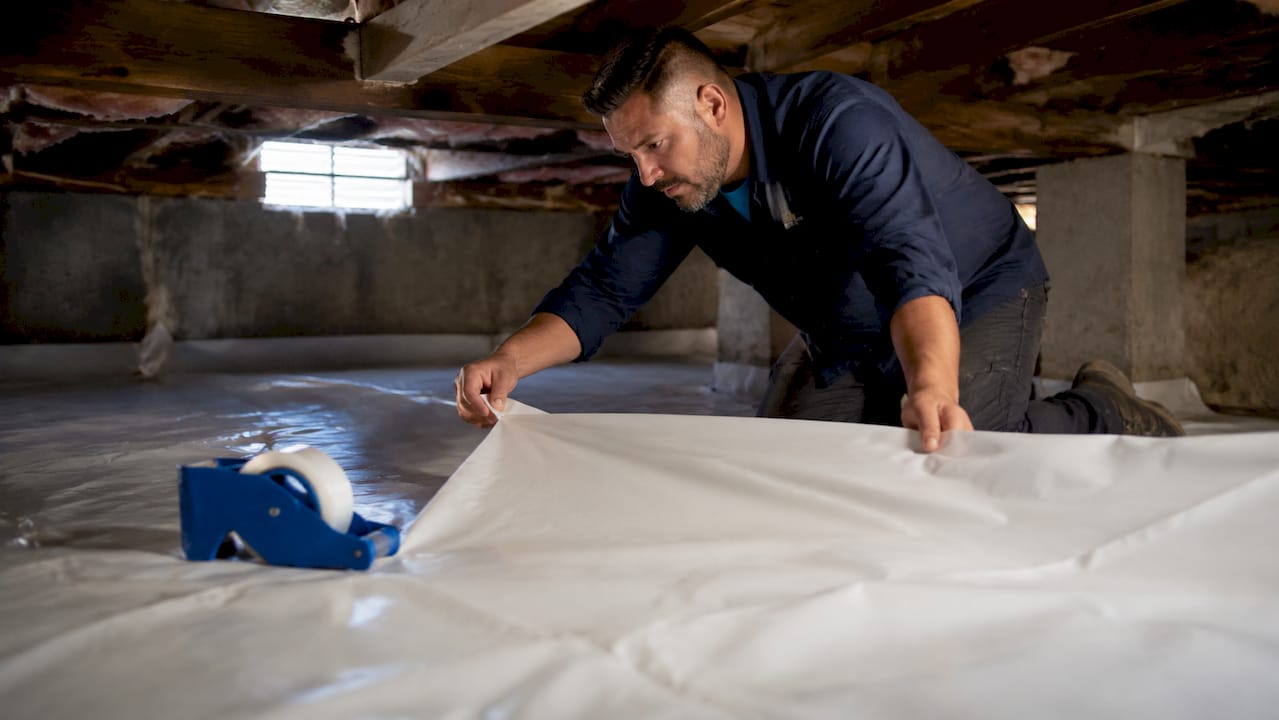
The industry term for this process is “crawl space encapsulation,” and it represents a significant shift from the older vented crawl space model. Traditional vented crawl spaces were designed to let outdoor air circulate beneath the home. Modern building science shows that approach fails in humid climates, because warm, moist outdoor air enters the cool crawl space and condenses directly on wood framing and insulation.
What components make up a crawl space encapsulation system?
A complete encapsulation system has several distinct parts. Each one serves a specific function, and skipping any one of them reduces the effectiveness of the whole system.
- Vapor barrier liner: A 12–20 mil reinforced polyethylene sheet covers the entire crawl space floor and extends up the foundation walls. Thicker liners resist punctures from foot traffic and pest activity.
- Sealed seams and penetrations: Seams between liner panels overlap at least 12 inches and are secured with crawl-space-rated adhesive tape and mechanical fasteners. Pipes, columns, and utility penetrations are individually sealed.
- Foundation vent sealing: All existing vents in the foundation wall are permanently sealed with rigid foam insulation and caulk to stop outside air from entering.
- Perimeter wall insulation: Rigid foam board or spray foam insulates the foundation walls and rim joists, reducing heat loss through the crawl space floor above.
- Mechanical dehumidifier: A crawl space dehumidifier maintains relative humidity between 45% and 55%, the range that prevents mold growth and wood rot.
- Drainage system (if needed): Homes with active water intrusion require an interior drainage channel and sump pump installed before the liner goes down.
Pro Tip: Ask your contractor to show you the liner’s mil rating and the tape brand before work begins. Residential-grade plastic sheeting and standard duct tape are not acceptable substitutes for crawl-space-rated materials.
How does encapsulation differ from a basic vapor barrier?
Homeowners frequently use “vapor barrier” and “encapsulation” as if they mean the same thing. They do not.
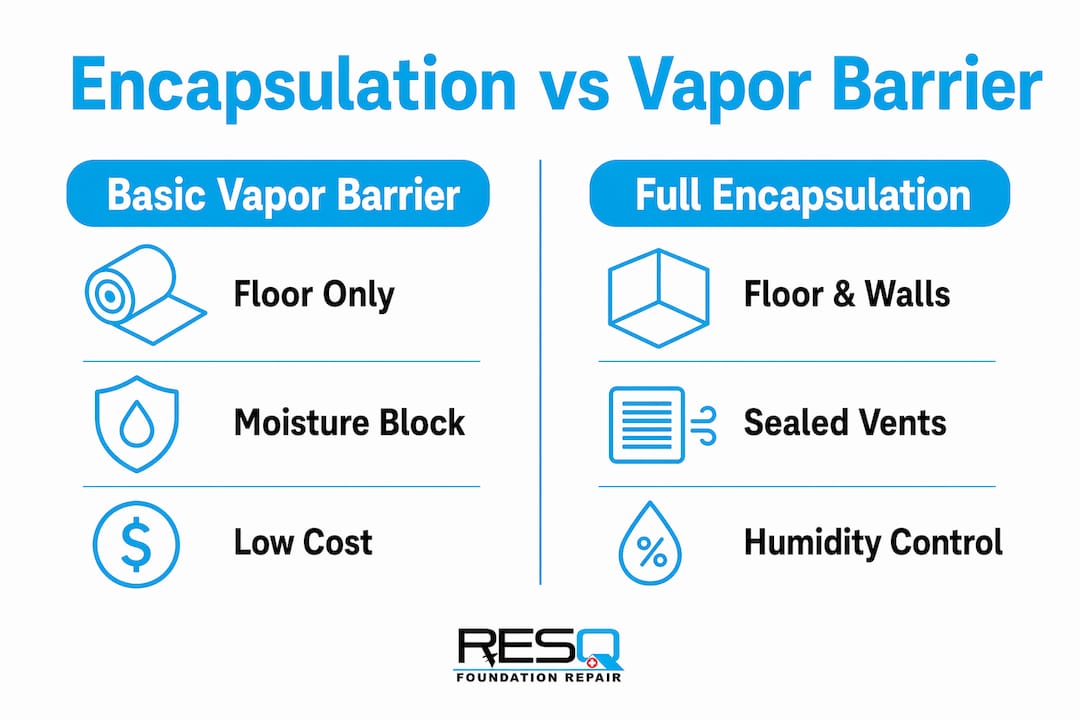
A basic vapor barrier is a single sheet of polyethylene plastic laid on the crawl space floor. It reduces moisture evaporation from the soil, but it leaves the walls exposed, the vents open, and the air uncontrolled. Humidity still enters through the foundation walls and open vents. The floor liner alone cannot stop that.
Full encapsulation adds sealed vents, wall coverage, and humidity control on top of the floor liner. That combination converts the crawl space from a vented zone into a conditioned one. The difference in performance is substantial.
| Feature | Basic vapor barrier | Full encapsulation |
|---|---|---|
| Ground moisture control | Yes | Yes |
| Foundation wall coverage | No | Yes |
| Vent sealing | No | Yes |
| Mechanical humidity control | No | Yes |
| Mold prevention effectiveness | Partial | High |
| Energy savings potential | Minimal | Up to 20% on HVAC |
Insulation adds another layer of confusion. Insulation controls heat transfer; encapsulation controls vapor and air movement. Both serve different purposes. Combining them produces the best outcome, but they are not interchangeable. A crawl space with insulation and no encapsulation still allows humid air to circulate freely beneath your floors.
What are the benefits of encapsulating your crawl space?
The advantages of a properly sealed crawl space extend well beyond moisture control. They affect your health, your energy bills, and your home’s long-term value.
- Mold and wood rot prevention: Encapsulation holds relative humidity at 45%–55%, the range where mold cannot establish colonies and wood framing stays structurally sound.
- Improved indoor air quality: Research on the “stack effect” shows that air from the crawl space rises into living areas. Sealing the crawl space reduces mold spores, radon, and soil gases from entering your home.
- Energy savings: A sealed and insulated crawl space can reduce HVAC costs by up to 20% by eliminating the cold, damp air that forces your heating and cooling system to work harder.
- Reduced pest activity: Sealed vents and a continuous liner remove the entry points and damp conditions that attract termites, rodents, and insects.
- Foundation protection: Stable humidity levels prevent the wood shrinkage and swelling cycles that loosen floor joists and cause structural movement over time.
- Home resale value: Encapsulation recoups 70%–90% of its initial cost at resale. Buyers and home inspectors treat an encapsulated crawl space as a premium feature.
That resale figure matters. A $7,000 encapsulation project could return $4,900–$6,300 when you sell, in addition to years of energy savings and avoided repair costs.
What do encapsulation cost, prerequisites, and maintenance look like?
Understanding the full investment means looking at upfront cost, required preparation, and ongoing upkeep together.
-
Budget for the full range. Crawl space encapsulation typically costs $3,000–$15,000 depending on square footage, liner thickness, drainage needs, and local labor rates. Smaller, dry crawl spaces land near the low end. Larger spaces with active moisture issues land near the high end. Review a detailed waterproofing cost guide before requesting quotes.
-
Fix water problems first. Encapsulation is ineffective if bulk water issues like flooding, plumbing leaks, or poor grading are not corrected before the liner is installed. Sealing a wet crawl space traps moisture inside and accelerates mold growth and wood decay.
-
Address mold before sealing. Active mold colonies must be remediated before encapsulation. Sealing mold beneath a liner does not kill it. It creates an anaerobic environment where certain mold species can continue to grow.
-
Schedule annual inspections. Annual inspections of the liner, dehumidifier, and drainage components are necessary to maintain performance. Punctures from pest activity or foot traffic compromise the seal. Dehumidifier filters and drainage pump floats require periodic servicing.
-
Vet your contractor carefully. Ask for references, proof of insurance, and a written scope of work that specifies liner mil rating, seam overlap dimensions, and dehumidifier capacity. Vague proposals often lead to undersized systems or skipped steps.
Pro Tip: Request that your contractor seal the crawl space doors and vents as part of the written scope. These are the most commonly overlooked penetrations in budget installations.
How do you decide if encapsulation is right for your home?
Not every crawl space needs full encapsulation. The right solution depends on your home’s current condition, your climate, and your goals.
- Signs that encapsulation is warranted: Visible mold or efflorescence on foundation walls, musty odors in living areas, cold or soft floors above the crawl space, damaged or wet insulation, condensation on pipes or wood framing, or a history of pest activity.
- Climate matters significantly. Building codes increasingly favor sealed crawl spaces in humid climates because vented designs cannot control moisture when outdoor humidity is consistently high. Homes in the southeastern United States, including Florida, are strong candidates.
- Encapsulation is not a substitute for drainage. If your crawl space floods seasonally, a sump pump and interior drainage channel must come first. Encapsulation manages vapor, not standing water.
- Pair encapsulation with the right insulation. Sealing the foundation walls and removing insulation from the floor joists above is the correct sequence for an encapsulated crawl space. Leaving batt insulation in the floor joists after encapsulation traps moisture against the wood.
- Get a professional assessment before committing. A qualified inspector can identify whether your crawl space needs drainage correction, mold remediation, or structural repair before encapsulation makes sense. Sequencing matters as much as the encapsulation itself.
For homeowners dealing with wet crawl space conditions, addressing the water source is always step one.
Key Takeaways
A fully encapsulated crawl space controls moisture, air quality, and energy loss through a sealed system of vapor barriers, vent sealing, insulation, and mechanical dehumidification that lasts 20–30 years and recoups 70%–90% of its cost at resale.
| Point | Details |
|---|---|
| Encapsulation vs. vapor barrier | Full encapsulation seals walls, vents, and controls humidity; a floor liner alone does not. |
| Core components | Requires a 12–20 mil liner, sealed seams, closed vents, wall insulation, and a dehumidifier. |
| Energy and health benefits | Can cut HVAC costs by up to 20% and prevents mold by holding humidity at 45%–55%. |
| Prerequisites matter | Fix bulk water intrusion and active mold before installing any liner or sealing any vent. |
| Maintenance is ongoing | Annual inspections of the liner, dehumidifier, and drainage system are required for lasting results. |
What I’ve learned after seeing hundreds of crawl spaces
The most common mistake I see homeowners make is treating encapsulation as a one-and-done purchase rather than a system that requires care. A liner installed five years ago with no follow-up inspection is often riddled with small punctures from pest activity or foot traffic. The dehumidifier drain line is clogged. The sump pump float has seized. The system looks intact from the access door, but it stopped performing two years ago.
The second mistake is buying encapsulation before fixing the water source. I have seen beautiful liner installations completely undermined by a downspout that discharges against the foundation. The liner balloons up with hydrostatic pressure, the seams separate, and the homeowner wonders why their crawl space still smells like mildew.
What actually works is the integrated approach: drainage first, mold remediation if needed, then encapsulation, then annual maintenance. That sequence is not exciting, and it is not cheap. But it is the only sequence that produces a crawl space that performs for 20 years instead of two.
Building codes in humid-climate states are moving toward conditioned crawl spaces as the standard, not the upgrade. Homeowners who encapsulate now are ahead of that curve. They are also protecting the largest investment most of them will ever make.
— Kayle
Foundationresq crawl space solutions for Tallahassee homeowners
Foundationresq specializes in crawl space encapsulation and full moisture remediation for homes in the Tallahassee area. The team assesses drainage, mold, and structural conditions before any liner goes down, so the encapsulation actually performs as designed.
Foundationresq also handles crawl space waterproofing, dehumidification, and mold removal as part of a coordinated remediation plan. Financing options are available for homeowners who need to address multiple issues at once. Contact Foundationresq for a free inspection and a written scope of work before you commit to any crawl space project.
FAQ
What does an encapsulated crawl space include?
An encapsulated crawl space includes a heavy-duty polyethylene liner on the floor and walls, sealed foundation vents, perimeter insulation, and a mechanical dehumidifier. All seams are taped and mechanically fastened to create an airtight seal.
How long does crawl space encapsulation last?
A properly installed encapsulation system lasts 20–30 years with annual maintenance. Liner punctures, dehumidifier failures, and drainage clogs are the most common causes of early system degradation.
Does encapsulation increase home value?
Encapsulation recoups 70%–90% of its cost at resale and is treated as a premium feature by buyers and home inspectors, particularly in humid climates where moisture damage is a known risk.
Can I encapsulate a crawl space myself?
DIY encapsulation is possible for small, dry crawl spaces, but most homeowners lack access to commercial-grade liners, crawl-space-rated tape, and properly sized dehumidifiers. Improper seam sealing or skipped vent sealing significantly reduces system performance.
What happens if I skip encapsulation and just use a vapor barrier?
A basic floor liner reduces soil moisture evaporation but leaves foundation walls and vents open to humid outdoor air. Humidity still enters through those pathways, and mold, wood rot, and energy loss continue largely unchecked.
Recommended
- Beginner’s Guide to Crawl Space Encapsulation – Tallahassee Foundation Repair | Foundation ResQ
- Is Crawl Space Encapsulation Worth It? A Tallahassee Homeowner’s Guide for 2026 – Tallahassee Foundation Repair | Foundation ResQ
- Crawl Space Encapsulation Tallahassee: The Complete Homeowner’s Buying Guide for 2026 – Tallahassee Foundation Repair | Foundation ResQ