
Mold travels through a home by three primary routes: airborne spores carried by indoor air currents, water moving through building materials by liquid flow or capillary wicking, and mechanical distribution through HVAC systems and disturbed surfaces. Moisture is the single variable that controls whether spores stay dormant or start a colony. Cut the moisture, and spread stops. Leave it, and mold can reach rooms far from the original source faster than most homeowners expect.
Primary spread pathways at a glance:
- Airborne aerosolization: Spores detach from surfaces and float through rooms, settling on new wet spots
- Water intrusion and wicking: Liquid water carries spores along framing, insulation, and drywall; capillary action pulls moisture (and spores) deeper into porous materials
- HVAC and duct distribution: Forced-air systems recirculate spore-laden air throughout the entire house
- Hidden cavity migration: Spores move through wall cavities via electrical boxes, plumbing chases, and gaps larger than the spores themselves
- Disturbed materials: Demolition, cleaning without containment, or even opening a wall cavity releases concentrated spore clouds
Pro Tip: Stop the water source first, before anything else. And if you suspect mold contamination in your ducts, turn off the forced-air system immediately. Running it while mold is active is one of the fastest ways to distribute spores to every room in the house.
Table of Contents
- How mold spreads through home structures: the biology and physics behind it
- Which building materials and locations are most vulnerable to hidden mold?
- What actually controls whether mold spreads or stays dormant?
- Why mold spreads through ductwork faster than anywhere else
- How remediation work itself can spread mold if done wrong
- How do you detect hidden mold before it spreads further?
- When structural repair is the only real fix for persistent mold
- What to do the moment you find mold in your home
- How do you know when remediation is actually finished?
- Key Takeaways
- The part most homeowners get wrong about mold
- What Foundationresq does when mold has a structural cause
- Useful sources and further reading
- FAQ
How mold spreads through home structures: the biology and physics behind it
Mold reproduces by releasing spores, microscopic particles ranging from 2 to 100 microns in diameter. A single colony can release millions of spores under the right conditions, and those spores are light enough that ordinary indoor air movement keeps them aloft for extended periods.
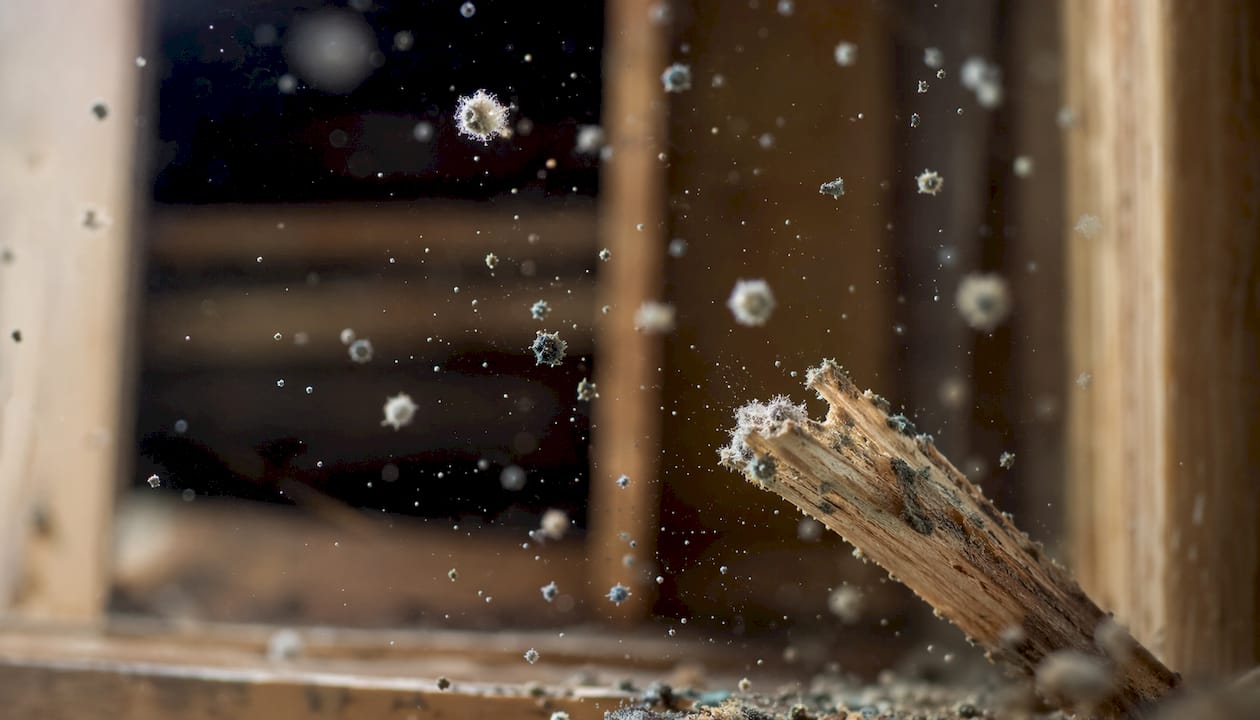
The physics of aerosolization matter here. Controlled experiments found that mild airflow at or below 1.0 m/s — the speed of a gentle indoor breeze or a person walking through a room — is enough to detach spores from contaminated surfaces. In those experiments, aerosolization began within 0.18 seconds of airflow exposure, with between 30.4% and 85.2% of released spores remaining suspended in the air for a full 10 minutes. That is not a dramatic disturbance. That is someone walking past a moldy wall.
Not every mold species behaves the same way. Species like Stachybotrys chartarum (commonly called black mold) have spores that are tightly bound to colonies and resist detachment under typical indoor airflow. For those species, physical disruption — demolition, scrubbing, or opening a wall — is the primary dispersal event. That distinction matters when planning remediation.
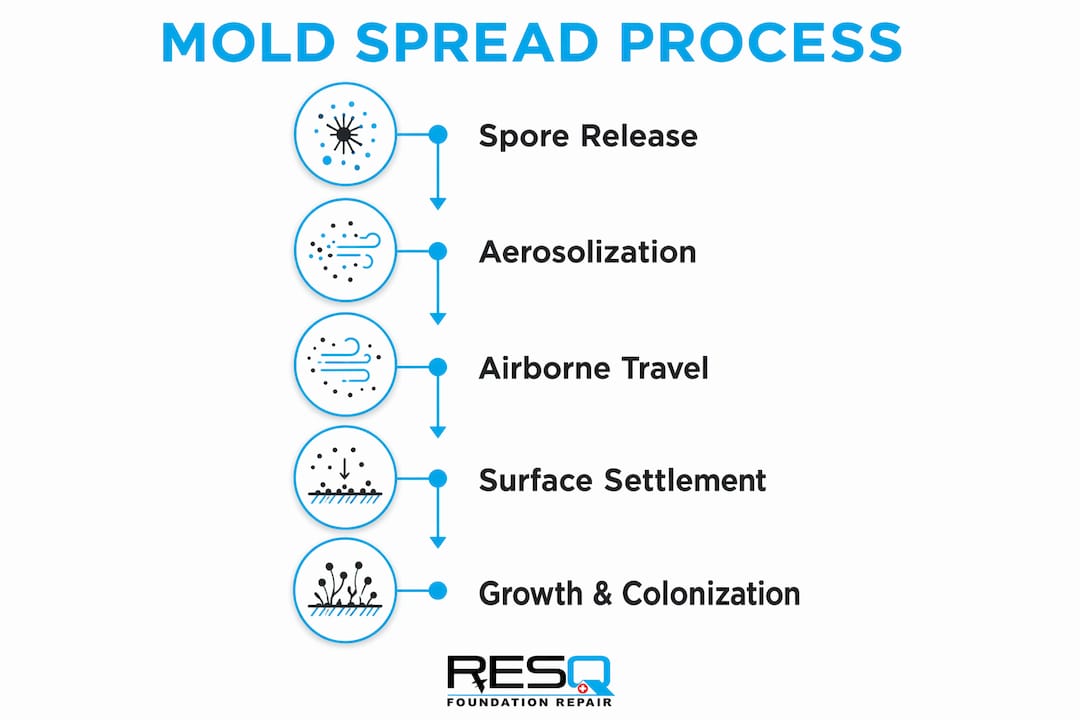
Once airborne, spores follow air currents: through doorways, up stairwells, into return-air vents, and eventually into settled dust on floors and furniture. When disturbed again — by foot traffic, vacuuming without a HEPA filter, or a fan — they resuspend and start the cycle over.
The connected pathway from surface to room:
- Surface colony → airflow detaches spores → spores travel through room air
- Spores enter return-air vent → HVAC distributes to other zones
- Spores settle in dust → resuspend with activity → deposit on new wet surfaces
- New wet surface supports germination → new colony forms
| Aerosolization metric | Measured value |
|---|---|
| Airflow speed triggering detachment | ≤1.0 m/s (mild indoor breeze) |
| Time to first aerosolization | 0.18 seconds |
| Spores suspended after 10 minutes | 30.4%–85.2% of released particles |
| Spore size range | 2–100 µm |
A separate factor is building leakage. Particle penetration through cracks whose minimum dimension exceeds roughly 1 mm is essentially complete across the 0.1–10 µm size range under typical indoor-outdoor pressure differences. Most wall assemblies have gaps far larger than 1 mm at electrical boxes, plumbing penetrations, and framing joints. Spores move through those gaps freely.
Which building materials and locations are most vulnerable to hidden mold?
Porous materials are the highest-risk hosts because they hold moisture and provide organic food for mold simultaneously. The list of vulnerable materials in a typical home is longer than most people realize:
- Drywall (gypsum board): The paper facing is cellulose-based and an ideal food source; once the paper is wet, mold can establish quickly
- Wood framing and sheathing: Absorbs and holds moisture; mold can penetrate the wood surface and become difficult to clean without removal
- Fiberglass batt insulation: Does not feed mold directly, but traps moisture and dust that do
- Cellulose insulation: Organic by nature and highly susceptible when wet
- Carpet and pad: Both absorb water and are nearly impossible to fully dry once saturated; the pad is especially problematic because it stays wet long after the surface feels dry
- Ceiling tiles: Often cellulose-based and located directly below roof leaks or condensing pipes
Location matters as much as material. The highest-risk spots in a home are the ones that combine moisture, limited airflow, and organic material:
Attics: Poor ventilation plus roof leaks or inadequate insulation create condensation on sheathing. Mold here often goes unnoticed for years.
Crawl spaces and basements: Below-grade spaces are chronic moisture sources. Ground vapor, condensation on cold surfaces, and poor drainage combine to create persistent wet conditions. Mold in these spaces feeds the rest of the house through stack effect air movement.
Interior wall cavities: Hidden from view, these spaces can harbor significant growth. Spores migrate from wall cavities into occupied rooms through electrical boxes and plumbing chases, since those gaps easily exceed the diameter of fungal spores.
Behind cabinets and baseboards: Slow plumbing leaks here go undetected for months. The enclosed space keeps materials wet and limits drying.
Under flooring: Subfloor wetting from plumbing failures or slab condensation creates ideal conditions that are invisible until flooring is removed.
One underappreciated point: mold does not need a cellulosic surface to grow. Dust accumulation and organic films on otherwise inert surfaces — painted concrete, glass, metal pipe — can support mold growth when humidity stays elevated. The dust is the food source, not the substrate.
Signs that strongly suggest hidden spread: persistent musty odor with no visible mold, peeling paint or wallpaper on interior walls, localized condensation on walls or floors, and staining that reappears after cleaning.
What actually controls whether mold spreads or stays dormant?
Moisture is the gatekeeper. Without liquid water or sustained high humidity, spores will not germinate. They can sit dormant in dust for years, waiting. The moment a surface stays wet long enough, growth begins.
The EPA’s guidance on this is direct: mold will not grow without water or moisture, and fixing the moisture source is the prerequisite for any cleanup to hold. Cleaning mold without addressing the source is a temporary fix at best.
Common moisture sources and why each is risky:
- Plumbing leaks (supply and drain lines): Slow leaks inside walls can wet framing for months before visible damage appears
- Roof leaks: Water travels along rafters and sheathing before dripping, spreading contamination far from the entry point
- Condensation: Cold surfaces in warm, humid air — basement walls, cold-water pipes, window frames — collect moisture daily
- Poor exterior grading: Soil sloped toward the foundation directs surface water into the basement or crawl space
- High indoor humidity: Sustained relative humidity above 60% is enough to support mold growth on surfaces that are not visibly wet
- Vapor diffusion: In humid climates, water vapor migrates through wall assemblies and can condense inside cavities at thermal bridges
On timelines: the EPA notes that materials dried within 24–48 hours of wetting typically will not become moldy. That window is not a guarantee — it depends on the material, the ambient temperature, and how wet the material got. Dense wood framing soaked by a pipe burst takes far longer to dry than a surface-wet tile floor. The practical takeaway is that speed matters more than any fixed number.
Deciding whether a wet event likely produced active mold:
- Visible discoloration or fuzzy growth on wet materials
- Persistent musty odor after the area has dried
- Materials that stayed wet for more than two days
- Drywall or wood that feels soft or shows surface staining
Why mold spreads through ductwork faster than anywhere else
HVAC systems are uniquely effective at distributing spores because they move large volumes of air continuously, at velocities that keep particles suspended, and they connect every room in the house. A colony in one return-air zone can seed every supply register in the building within hours of the system running.
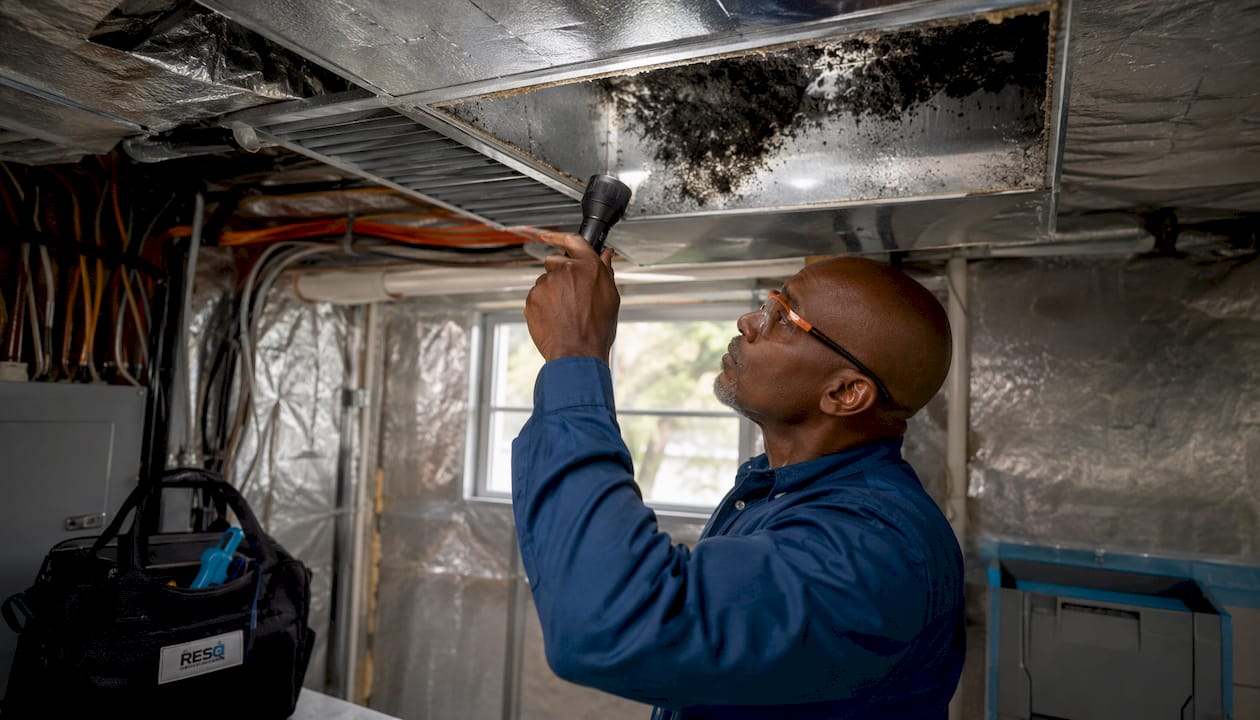
The highest-risk components inside mechanical systems are the ones that stay wet by design or by failure. HVAC condensate pans and poorly drained drain lines are frequent colonization sites. Once a colony establishes in a condensate pan or on wet duct liner insulation, the system becomes a distribution network. Humidifiers that are not cleaned regularly are another common source, as are air handlers with wet insulation lining on the interior walls of the unit.
High-risk HVAC components to inspect:
- Condensate drip pans and drain lines (check for standing water or slime)
- Interior insulation lining of air handlers and ductwork
- Filters (a clogged filter creates a wet, organic surface)
- Humidifier pads and reservoirs
- Fresh-air intakes near grade level or near known mold sources
If you suspect duct contamination, the first action is to stop running the system. Every hour it runs while contaminated extends the spread. Isolate the zone if possible, or shut down entirely until an inspection is complete.
Pro Tip: When you call an HVAC technician for a mold-related inspection, ask them specifically to check condensate drainage slope and pan condition, the integrity of duct liner insulation (look for wet or delaminated sections), filter fit and type (a loose filter bypasses filtration entirely), and whether any duct sections show visible biological growth. A general “looks fine” answer is not enough.
How remediation work itself can spread mold if done wrong
Opening a moldy wall cavity without containment is one of the most effective ways to turn a localized problem into a whole-house contamination. The disturbance releases spore concentrations far higher than background levels, and without negative pressure and filtration, those spores travel wherever the air goes.
The EPA frames containment as the central defense in remediation precisely because remediation activities are the most common cause of large-scale spore release. The guidance distinguishes between limited containment (for smaller affected areas, typically under 30 square feet) and full containment (for larger or more severe contamination), with both requiring negative air pressure and HEPA-filtered exhaust.
What proper containment includes:
- Polyethylene sheeting sealed over doorways and openings
- Negative air pressure maintained inside the work area (air exhausted outward, not inward)
- HEPA air scrubbers running continuously during work
- PPE for workers: N95 respirator minimum, gloves, disposable coveralls
- Wet methods for material removal to suppress dust
Remediation sequence — what to expect from a professional:
- Assess the full extent of contamination (moisture mapping, visual inspection, probing)
- Isolate the work area with polyethylene barriers and seal HVAC registers
- Set up PPE and containment before opening any cavities
- Remove or clean affected materials using wet methods; bag and seal waste immediately
- HEPA vacuum all surfaces in the work area, including framing and structural members
- Verify the moisture source is fixed before closing up assemblies
- Clearance check: visual inspection confirms no visible mold, moisture readings are within normal range, and no musty odor remains
Pro Tip: Never use a standard shop vacuum or a box fan blowing out a window as a substitute for a HEPA air scrubber. Both will distribute spores rather than capture them. If a contractor proposes either as their containment method, that is a red flag.
For a detailed breakdown of what the mold remediation process involves step by step, Foundationresq’s guide covers the full sequence from assessment through clearance.
How do you detect hidden mold before it spreads further?
The challenge with hidden mold is that by the time it is visible, it has usually been growing for a while. The goal of inspection is to find it before it reaches that stage, or to map its full extent when it already has.
Inspection tools and what each reveals:
- Moisture meter: Measures moisture content in drywall, wood, and concrete; readings above 17% in wood or 1% in drywall typically indicate conditions that support mold
- Thermal imaging camera: Detects temperature differentials caused by evaporative cooling from wet materials; shows moisture patterns behind walls without opening them
- Borescope camera: A small camera on a flexible cable inserted through a small drilled hole; provides direct visual access to wall cavities, under floors, and inside duct sections
- Hygrometer: Measures ambient relative humidity; sustained readings above 60% indicate conditions favorable for growth
- Visual inspection: Still the most important tool; look for staining, discoloration, efflorescence on concrete, and any soft or delaminated surfaces
Lab sampling (air or surface) is rarely necessary when visible mold and a moisture source are both present. The EPA’s guidance is clear: in most cases, if visible mold exists, sampling does not change the remediation approach. Testing becomes more useful for large or complex jobs where the extent of hidden contamination is genuinely unclear, or for post-remediation clearance verification on significant projects.
The aerosolization research cited earlier has a direct implication for inspection: even the act of opening a wall cavity or probing with a borescope can release spores into the room. Any invasive inspection should be treated as a potential disturbance event.
Pro Tip: Always sequence inspection from least invasive to most invasive. Start with visual inspection and moisture mapping, then thermal imaging, then borescope if needed. Use PPE and temporary containment before opening any assembly. For a professional mold inspection, look for a provider who documents moisture readings and uses thermal imaging as standard practice, not as an add-on.
For crawl-space-specific testing guidance, Foundationresq’s crawl space mold testing guide covers what to look for and when sampling actually adds value.
When structural repair is the only real fix for persistent mold
Remediation without fixing the structural cause of moisture is a cycle, not a solution. If water keeps entering through a foundation crack, a failed window well, or inadequate perimeter drainage, mold will return regardless of how thoroughly the visible growth was removed.
Below-grade spaces are chronic moisture sources that drive whole-house humidity and spore loads. Crawl spaces with exposed soil, inadequate vapor barriers, or open vents in humid climates continuously introduce moisture into the building assembly. Basements with hydrostatic pressure pushing water through walls create persistent wet conditions that no amount of surface cleaning resolves.
Structural fixes that address root-cause moisture:
- Exterior grading and drainage: Correcting soil slope away from the foundation and extending downspouts stops surface water from entering
- Waterproofing (interior and exterior): Interior drainage systems and sump pumps manage water that enters; exterior waterproofing membranes stop it at the wall
- Window well repair and covers: Failed window wells are a direct path for surface water into below-grade spaces
- Crawl-space encapsulation: A sealed vapor barrier system eliminates ground moisture as a source; crawl-space encapsulation is one of the most effective long-term recurrence prevention measures available
- Crawl-space dehumidification: A dedicated dehumidifier maintains relative humidity below the threshold for growth year-round
- Sump pump installation: Manages groundwater in high-water-table areas
The sequencing rule is firm: fix the structural cause before replacing drywall, insulation, or any other material. Installing new drywall over a foundation that still leaks produces new mold within one to two seasons.
Pro Tip: After any structural moisture repair, track interior humidity with a hygrometer for at least 60 days before declaring success. Moisture in building assemblies takes time to dissipate, and a single dry week does not confirm the fix worked. Look for consistent readings below 55% relative humidity and confirm with a moisture meter on previously affected framing.
What to do the moment you find mold in your home
Speed limits spread. The longer mold grows undisturbed with an active moisture source, the more material it colonizes and the more spores it releases into the air.
Immediate steps:
- Stop the water source — shut off the supply valve, patch the roof leak, or redirect drainage before anything else
- Isolate the area — close doors to the affected room; seal gaps under doors with towels if needed
- Turn off forced-air systems if contamination is suspected in or near ductwork
- Increase drying in uncontaminated adjacent areas using dehumidifiers and ventilation, but do not blow air directly into a moldy space
- Remove small wet items (rugs, cardboard, soft goods) that cannot be dried within 24–48 hours
- Document the damage with photos and notes for insurance purposes before removing anything
When to call a professional instead of handling it yourself:
- Visible mold covers more than 10 square feet
- You suspect HVAC contamination
- Structural materials (framing, subfloor) are wet or visibly affected
- A persistent musty odor remains after the area appears dry
- Any occupant is immunocompromised, has asthma, or has reported symptoms
For small DIY cleanups (under 10 square feet, non-porous surfaces), use gloves and an N95 respirator. Avoid dry brushing, which aerosolizes spores, and never use a standard fan to “dry out” a moldy space without containment. For anything involving crawl space or basement mold, professional assessment is almost always the right call given the structural complexity involved.
How do you know when remediation is actually finished?
Remediation is complete when the conditions that allowed mold to grow no longer exist and when the physical mold has been removed. A clean-looking surface is not sufficient on its own.
Completion checklist:
- All visible mold has been removed or the affected material has been taken out entirely
- Moisture source is confirmed fixed (not just patched)
- Building materials in the affected area have dried to acceptable moisture content (wood framing below 19%, drywall below 1%)
- No persistent musty odor remains in the space
- HVAC system has been inspected and cleaned if contamination was confirmed
- A final visual inspection shows no remaining discoloration, staining, or biological growth
The EPA’s remediation guidance recommends that containment remain in place and negative pressure be maintained until all work is complete and a final inspection confirms clearance. For larger jobs (typically those that required full containment), post-remediation clearance testing by an independent inspector adds a defensible verification layer. For smaller residential jobs where the source was clearly identified and fully addressed, a thorough visual inspection combined with moisture meter readings across all affected materials is usually sufficient.
One signal that remediation is not complete: musty odor that returns within days of the work finishing. That almost always means either the moisture source was not fully addressed or mold in an adjacent hidden area was not found.
Key Takeaways
Moisture control is the single most effective strategy for preventing mold growth in homes: fix water sources first, dry materials within 24–48 hours of wetting, and address structural moisture problems before any cosmetic repair.
| Point | Details |
|---|---|
| Moisture is the controlling variable | Spores cannot grow without sustained moisture; eliminating the water source stops spread. |
| HVAC amplifies distribution | Turn off forced-air systems immediately if duct contamination is suspected to prevent whole-house spread. |
| Hidden cavities are high-risk | Wall cavities, crawl spaces, and basements spread mold silently through gaps and service penetrations. |
| Containment prevents remediation spread | Disturbing mold without negative pressure and HEPA filtration turns a local problem into a building-wide one. |
| Foundationresq addresses root causes | Foundationresq provides structural moisture fixes, crawl-space encapsulation, and professional remediation to stop recurrence, not just surface cleanup. |
The part most homeowners get wrong about mold
Most people treat mold as a cleaning problem. They see it, they scrub it, they move on. The mold comes back, sometimes in the same spot, sometimes somewhere new, and they repeat the cycle.
What the research and the structural evidence actually show is that mold is a building-physics problem first. Temperature differentials, vapor pressure, thermal bridges, and drainage failures drive moisture into assemblies where mold propagates invisibly for months before anyone notices. By the time there is a visible colony on a wall surface, the hidden spread has usually already happened.
The other thing homeowners consistently underestimate is how much the remediation process itself can make things worse. Opening a wall without containment, running a fan through a moldy space, or vacuuming without a HEPA filter are all actions that spread spores rather than remove them. The instinct to “air it out” is almost always wrong when active mold is present.
Below-grade spaces deserve particular attention. Crawl spaces and basements are not just isolated problem areas; they are the humidity and spore source for the entire house through stack effect airflow. Addressing a crawl space properly, with encapsulation, drainage, and dehumidification, typically produces a larger reduction in whole-house mold risk than any amount of surface remediation in living areas above.
The practical conclusion: if mold keeps coming back, stop looking at the mold and start looking at where the water is coming from and how the building is managing it.
What Foundationresq does when mold has a structural cause
When mold keeps returning despite surface cleanup, the problem is almost always below the surface. Foundationresq specializes in exactly that intersection: structural moisture control combined with professional mold remediation, so the fix addresses the cause rather than just the symptom.

A typical Foundationresq engagement starts with a thorough inspection that includes moisture mapping, thermal imaging where appropriate, and a structural assessment of below-grade spaces. From there, the team can handle the full scope: containment and remediation of active mold, basement waterproofing, crawl-space encapsulation, dehumidification systems, and post-repair verification to confirm moisture levels have normalized. Financing options are available for homeowners facing larger structural repairs.
If you have found mold and want to understand what is actually driving it, the right first step is a professional inspection. Visit Foundationresq’s services page to request an inspection or get a project estimate.
Useful sources and further reading
These are the primary references behind this guide, listed for homeowners who want to go deeper or verify specific claims:
-
EPA: A Brief Guide to Mold, Moisture and Your Home — The foundational EPA consumer guide covering moisture control, health effects, and when to call professionals. The starting point for any homeowner dealing with mold.
-
EPA Mold Course, Chapter 1 — Covers mold biology, spore characteristics, and the conditions required for growth. Useful for understanding why spores are ubiquitous but only problematic when moisture is present.
-
EPA Mold Course, Chapter 3 — Covers inspection methodology, the 24–48 hour drying window, HVAC contamination, and when sampling is and is not necessary.
-
EPA: Mold Remediation in Schools and Commercial Buildings — The detailed EPA remediation guidance covering containment levels, negative pressure, HEPA filtration, and PPE requirements. The professional standard for remediation practice.
-
New York State Department of Health: Mold and Your Home — State health department guidance on mold routes of spread, health effects, and remediation recommendations for homeowners.
-
Aerosolization study: Correlating surface mold contamination with airborne pollution under mild indoor air disturbance (ScienceDirect) — Controlled experiments measuring how quickly and at what concentrations mold spores become airborne under mild indoor airflow conditions.
-
Indoor bioaerosol dynamics and building leakage (PMC) — Research on how building cracks and gaps allow near-complete particle penetration across the spore size range, explaining hidden cavity migration.
-
Spore adhesion and detachment forces (PMC) — Micromanipulation research showing why some species (including Stachybotrys) require physical disturbance to release spores, with implications for remediation method selection.
“Investigating hidden mold requires caution since disturbing moldy areas may spread mold throughout the building. Opening and closing air handlers, for example, can send high levels of dust and mold into the air.” — EPA Mold Course, Chapter 3
This article is general educational information, not professional advice. Mold situations vary significantly by home, climate, and contamination extent. Confirm current guidance and your specific situation with a qualified remediation professional or your local health authority.
FAQ
How long does it take for mold to spread in a house?
Mold can begin growing on wet materials within 24–48 hours under the right conditions, though the actual timeline depends on the material, temperature, and how wet the surface is. Once established, a colony can release spores that seed new areas within days if moisture and airflow conditions allow.
What are the first signs of mold in a structure?
The earliest signs are usually a persistent musty odor with no visible source, localized condensation on walls or floors, and paint or wallpaper that peels without an obvious cause. Visible discoloration or fuzzy growth typically appears after the mold has already been growing for some time.
What kills mold permanently in a house?
No surface treatment eliminates mold permanently on its own. The only durable solution is removing the moisture source, drying affected materials, and physically removing or replacing contaminated porous materials. Treatments applied without fixing the moisture source will fail when conditions return.
Is it safe to stay in a house with active mold growth?
It depends on the extent and location of the mold, and on the health status of the occupants. Small, isolated surface mold in a well-ventilated area poses lower risk than contamination in HVAC systems or large structural areas. Immunocompromised individuals, young children, and people with respiratory conditions should avoid prolonged exposure and consult a physician.
Does running the HVAC spread mold through the house?
Yes. A forced-air system recirculates air from every return vent and distributes it through every supply register, carrying airborne spores with it. If mold contamination is suspected in or near ductwork, the system should be shut off until an inspection is complete.
Recommended
- Is Mold in Your Crawl Space Dangerous? Health and Structural Risks Explained – Tallahassee Foundation Repair | Foundation ResQ
- Don’t Get Moldy: Simple Ways to Check for Mold in Your House – Tallahassee Foundation Repair | Foundation ResQ
- Mold Remediation Costs Uncovered: A Homeowner’s Guide – Tallahassee Foundation Repair | Foundation ResQ