
A crawl space assessment is a systematic inspection of the area beneath your home to detect moisture intrusion, mold growth, structural damage, and pest activity before they become costly repairs. Every homebuyer and homeowner who wants to protect their investment should know how to assess crawl space during home walkthrough conditions, not just rely on a general home inspector’s summary. The stakes are real: moisture trapped under a home can rot floor joists, feed mold colonies, and compromise the structural integrity of the entire building. Catching these problems early gives you negotiating power before closing or time to act before minor issues escalate.
What tools and safety equipment do you need to inspect a crawl space?
The right gear separates a useful inspection from a dangerous one. A pin-type moisture meter is the single most important tool you can bring. It gives you a direct reading of wood moisture content at sill plates and floor joists, which are the first structural members to show signs of water damage. A hygrometer measures ambient humidity in the space, which tells you whether conditions are actively promoting mold growth.
Personal protective equipment is non-negotiable before you enter. A P100 respirator filters out mold spores and insulation fibers. Heavy-duty gloves protect against sharp debris, pest droppings, and contaminated surfaces. Knee pads and a Tyvek coverall keep you comfortable and protected during the crawl. A bright headlamp keeps both hands free for testing and documenting.
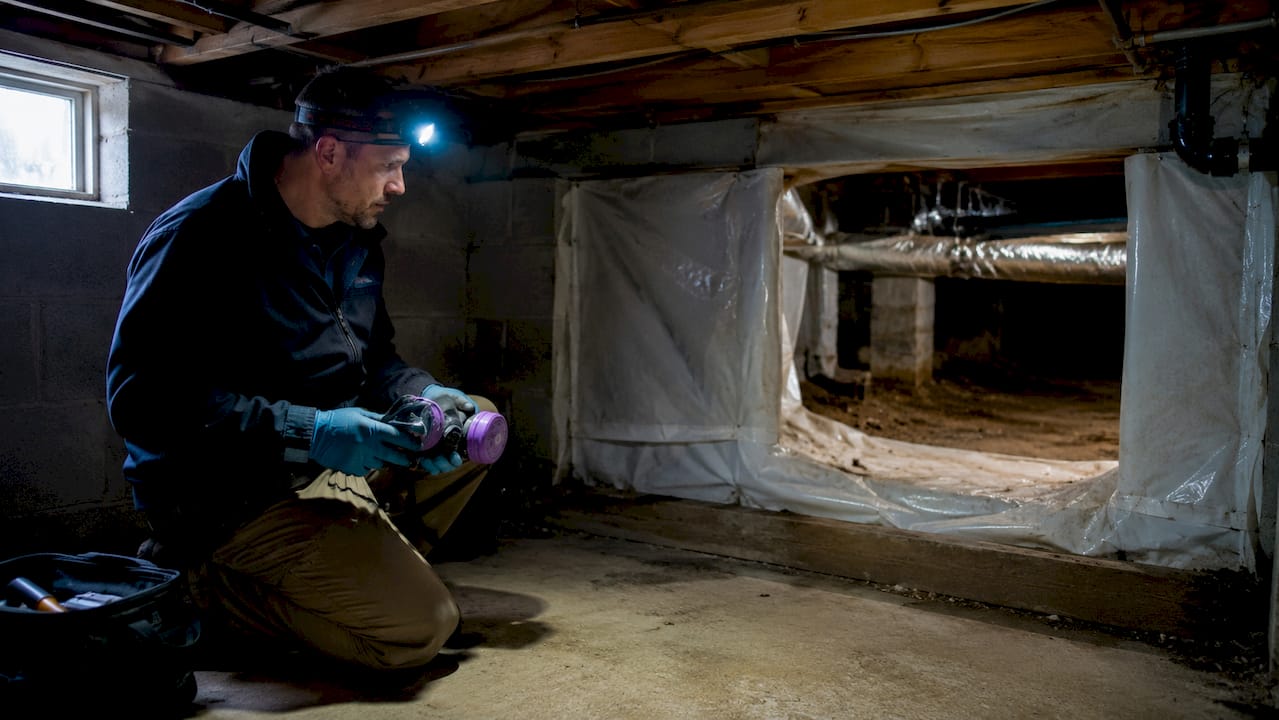
Pro Tip: Pack a basic inspection kit in a small bag before every walkthrough: headlamp, moisture meter, hygrometer, flathead screwdriver, and your phone for photos. You can assemble this kit for under $100 and it pays for itself the first time you catch a hidden moisture problem.
The table below summarizes the core tools and their purpose during a crawl space evaluation.
| Tool / Equipment | Purpose | Usage Note |
|---|---|---|
| Pin-type moisture meter | Measures wood moisture content | Test sill plates and floor joists directly |
| Hygrometer | Measures ambient humidity | Readings above 60% indicate risk conditions |
| Headlamp | Hands-free lighting | Essential for dark, low-clearance areas |
| Flathead screwdriver | Tests wood firmness | Probe joists for softness indicating rot |
| P100 respirator | Filters mold spores and fibers | Required before entering any suspect space |
| Gloves and knee pads | Physical protection | Heavy-duty gloves preferred |
| Camera or smartphone | Photo documentation | Capture every area of concern |
The vapor barrier standard calls for 6-mil polyethylene or thicker, with seams overlapped by at least 6 inches. Knowing this spec before you enter means you can immediately identify substandard or missing barriers without guessing.
How to conduct a step-by-step crawl space inspection
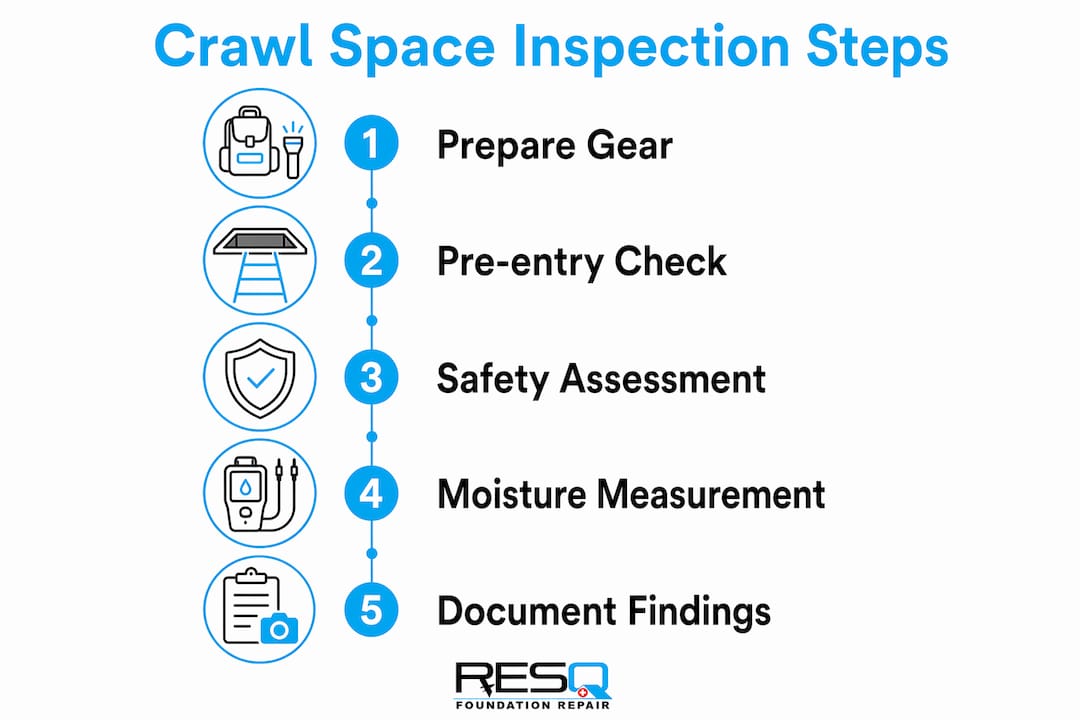
A thorough crawl space inspection during a home walkthrough follows a clear sequence. Skipping steps or rushing through the process leads to missed findings that show up as expensive surprises after closing.
Pre-entry checks
Before you open the access hatch, examine the exterior foundation for cracks, efflorescence (white mineral deposits), or signs of water pooling near the perimeter. Check that crawl space vents are present, unobstructed, and in good condition. Look at the grade of the soil around the foundation. The ground should slope away from the house, not toward it.
Entry and initial safety assessment
Standing water requires professional electrical clearance before you enter. If you see water at the access point, stop. Do not enter until a qualified electrician confirms there is no live wiring in contact with the water. If the clearance height is less than 18 inches, physical entry is unsafe. Use a camera on a pole or a smartphone on a selfie stick to document those areas instead.
The full inspection sequence
Follow these steps once you confirm it is safe to enter:
- Scan for standing water and active leaks. Look along the perimeter walls and beneath plumbing penetrations first.
- Inspect the vapor barrier. Check for tears, gaps, missing sections, and whether seams are properly overlapped. A damaged barrier is a direct path for ground moisture to enter the space.
- Check for mold and water stains. Look at the underside of the subfloor, the floor joists, and the rim joists. Dark staining or fuzzy growth signals a moisture problem.
- Test wood moisture content. Press the pins of your moisture meter into sill plates and floor joists at multiple points. Sill plate moisture above 19% signals active or past moisture intrusion. Readings above 28% typically indicate wood rot has already begun.
- Probe wood with a screwdriver. Push the tip firmly into joists and sill plates. Sound wood resists the probe. Soft or spongy wood means rot is present.
- Look for pest evidence. Mud tubes along foundation walls indicate termites. Droppings, nesting material, or gnawed insulation point to rodents.
- Assess insulation condition. Insulation that has fallen, sagged, or shows water damage no longer performs and often hides moisture problems beneath it.
- Check plumbing and HVAC components. Look for condensation on pipes, rust on metal components, and signs of past leaks around joints.
- Photograph everything. Capture the vapor barrier, any staining, moisture meter readings on the display, and the overall condition of the space.
Pro Tip: Schedule your crawl space walkthrough inspection within 24 hours after heavy rainfall. Post-rain inspections reveal active water intrusion and drainage problems that are invisible during dry conditions. A dry-weather inspection can miss the exact issues that matter most.
The critical warning signs to note during your visual scan include:
- Torn, missing, or improperly overlapped vapor barrier
- Water stains or tide marks on foundation walls
- Visible mold or dark discoloration on wood surfaces
- Soft or spongy wood when probed
- Mud tubes or insect galleries on foundation walls
- Fallen or water-damaged insulation batts
- Condensation on pipes or metal fasteners
- Musty or earthy odor upon entry
What warning signs indicate serious crawl space problems?
Some findings during a crawl space check are cosmetic. Others signal structural or health emergencies that require professional attention before you proceed with a purchase or continue living in the home.
A musty odor at the access hatch is a reliable early indicator. Musty smells signal a moisture-conducive environment, though they do not directly tell you the extent of mold growth. The smell alone justifies a closer look and, in most cases, a professional mold assessment. You can read more about the health implications in Foundationresq’s guide on crawl space mold risks.
Wood moisture readings above 19% at the sill plates are a hard threshold. That number is not arbitrary. Sill plates sit directly on the foundation, making them the first structural wood to absorb ground moisture. When they stay wet, the rot process begins and spreads upward into the floor system. Foundationresq’s resource on wood rot identification explains how to distinguish surface mold from deep structural decay, which changes the repair cost significantly.
Distinguishing surface mold from active wood rot is the most important judgment call in a crawl space inspection. Surface mold is a cleaning and moisture-control problem. Active wood rot is a structural repair problem. Treating them the same way leads to either unnecessary panic or dangerous underestimation of the damage.
Foundation cracks visible from inside the crawl space, especially horizontal cracks in block walls or stair-step cracks in brick, indicate soil pressure or settlement. These are not cosmetic. Pest evidence, particularly termite mud tubes, requires an immediate licensed pest inspection before any other work proceeds. Termites can hollow out floor joists while leaving the surface intact, making the screwdriver probe test especially important in areas with mud tube activity.
How to document and report your crawl space findings
Good documentation turns your inspection into a tool you can use. Whether you are negotiating a purchase price, requesting repairs from a seller, or planning your own remediation, clear records give you credibility and a baseline for future comparisons.
Follow these documentation practices during every inspection:
- Photograph systematically. Start at the access hatch and work in a consistent direction. Capture wide shots of each quadrant, then close-ups of every area of concern.
- Record moisture readings with the display visible. Take a photo of the meter pressed against the wood so the reading and the location are both in the frame.
- Write location-specific notes. “Moisture reading of 22% at northeast sill plate, 3 feet from access hatch” is useful. “High moisture in corner” is not.
- Note access limitations. If a section was inaccessible due to low clearance or standing water, document that explicitly. Low-clearance areas under 18 inches are often documented using cameras on poles to maintain safety and ensure complete coverage.
- Record ambient humidity. Note the hygrometer reading and the outdoor conditions at the time of inspection. A reading taken on a humid summer afternoon tells a different story than one taken in dry winter air.
The table below shows an effective documentation summary format you can complete on your phone during the walkthrough.
| Area Inspected | Condition | Moisture Reading | Action Required |
|---|---|---|---|
| Vapor barrier | Torn section, NW corner | N/A | Repair or replace barrier |
| Sill plates (N wall) | Staining visible | 24% | Professional evaluation |
| Floor joists (center) | Firm, no staining | 14% | Monitor annually |
| Insulation | Fallen in two sections | N/A | Reinstall or replace |
| Foundation walls | No visible cracks | N/A | No action needed |
Organized documentation also protects you legally. A standard home inspection covers the crawl space as part of a 2–4 hour process, but your own pre-inspection notes give you a second set of eyes and a record that predates the official report.
Key Takeaways
Effectively assessing a crawl space during a home walkthrough requires the right tools, a clear sequence, and documented findings that protect your investment before and after closing.
| Point | Details |
|---|---|
| Use a moisture meter at sill plates | Readings above 19% signal active moisture intrusion; above 28% indicate wood rot. |
| Follow a consistent entry sequence | Check for standing water and electrical hazards before entering any crawl space. |
| Document with photos and readings | Capture meter displays and location-specific notes for negotiations and future reference. |
| Know the vapor barrier standard | A 6-mil polyethylene barrier with 6-inch seam overlaps is the minimum effective spec. |
| Schedule inspections after rain | Post-rain walkthroughs reveal active drainage and intrusion issues that dry conditions hide. |
What I’ve learned from years of crawl space inspections
The most common mistake homebuyers make is treating the crawl space as an afterthought. They spend 45 minutes in the kitchen and 3 minutes under the house. That ratio is backwards. The crawl space is where the foundation, floor structure, plumbing, and moisture all intersect. Problems there affect every room above.
The second mistake is confusing a smell with a verdict. A musty odor is a signal to investigate, not a reason to walk away from a property. I have seen spaces that smelled terrible but had only surface mold on a small section of joist, fixable with cleaning and a dehumidifier. I have also seen spaces that smelled fine but had sill plates reading 26% moisture with no visible damage yet. The smell tells you to look harder. The meter tells you what you actually have.
Inspections are snapshots. Professional inspectors read patterns of damage rather than just active problems. A tide mark 4 inches up a foundation wall with no current water present still tells you that water reached that level at some point. That history matters for understanding what the space is capable of doing in a wet season.
My honest advice: if you find moisture readings above 19%, visible mold on more than a small isolated area, or any foundation cracking, stop and call a professional before you proceed. Early detection makes remediation manageable. Waiting turns a $1,500 vapor barrier replacement into a $15,000 structural repair.
— Kayle
Professional crawl space services from Foundationresq
Finding problems during a walkthrough is only half the equation. Knowing what to do next is where most homeowners get stuck.

Foundationresq specializes in crawl space waterproofing, encapsulation, and dehumidification for homeowners in the Tallahassee area. If your inspection turned up moisture readings above threshold, a damaged vapor barrier, or signs of mold, the Foundationresq team can assess the full scope and provide a clear repair plan. Their complete services cover everything from crawl space encapsulation systems to mold removal, so you are not coordinating multiple contractors for related problems. Contact Foundationresq for a free inspection if your walkthrough raised any red flags.
FAQ
How long does a crawl space inspection take?
A crawl space inspection typically takes 20–30 minutes as part of a full home inspection lasting 2–4 hours. Complex or large spaces with accessibility issues may take longer.
What moisture level is acceptable in a crawl space?
Wood moisture content below 19% at sill plates is the acceptable threshold. Readings above 19% indicate active or past moisture problems, and readings above 28% typically signal wood rot.
Can I inspect a crawl space myself before buying a home?
Yes, with proper PPE and tools, homebuyers can conduct a preliminary inspection. A professional inspection is still recommended before closing, especially if your walkthrough reveals any crawl space red flags.
What is the best time to inspect a crawl space?
Inspecting within 24 hours after heavy rainfall gives the most accurate picture of water intrusion and drainage issues. Annual inspections are recommended in late february or march and again in september.
Do I need a vapor barrier in my crawl space?
A vapor barrier is the primary defense against ground moisture. The standard specification is 6-mil polyethylene or thicker, with seams overlapped by at least 6 inches to prevent moisture from passing through gaps.