
Most slab foundation cracks are cosmetic, but a handful of warning signs mean you should stop guessing and call a professional. Cracks under about 1 mm wide (roughly hairline to credit card thickness) are usually shrinkage and just need monitoring or a simple seal. Anything horizontal, anything wider than a pencil tip, or anything paired with sticking doors and sloping floors needs a structural engineer’s eyes before you spend a dime on repairs.
TL;DR:
- Horizontal cracks, cracks wider than a credit card, or those associated with sticking doors and sloped floors require immediate professional evaluation.
- Cracks narrower than 1/16 inch, vertical, or diagonal with minimal width often indicate harmless shrinkage or minor settlement that can be monitored over time.
- Active cracks that widen or show signs of displacement, like height differences, require cause-specific repairs such as underpinning or drainage correction.
- Monitoring crack movement with regular measurements and photos can prevent unnecessary repairs and help identify true settlement or structural issues.
- Proper diagnosis involves inspecting soil conditions, moisture levels, and slab movement before choosing a tailored repair method like injection, leveling, or underpinning.
Table of Contents
- What Slab Foundation Cracks Look Like and How Serious They Are
- What Causes Slab Cracks (and Why It Changes the Fix)
- How to Inspect and Monitor a Crack Before Calling a Pro
- Repair Options for Slab Cracks, Cause by Cause, With Cost Ranges
- Simple Steps That Lower Your Risk of New or Worsening Cracks
- What to Expect During a Professional Slab Inspection
- A Conservative Approach Pays Off More Often Than Not
- How Foundationresq Approaches Slab Crack Diagnosis and Repair
- Sources
- FAQ
What Slab Foundation Cracks Look Like and How Serious They Are
Not all cracks carry the same risk, and the shape tells you almost as much as the width. A hairline crack (thinner than 1/16 inch, often looking like a pencil line in the concrete) is almost always cosmetic shrinkage cracking from the curing process. Vertical cracks running straight up and down usually indicate the same thing, or minor settling that has already stopped.
Diagonal or stair-step cracks, especially ones that widen at one end, point to differential settlement, meaning one part of the slab is sinking faster than another. Horizontal cracks are the outlier that always deserves a second opinion. They typically signal lateral pressure pushing against a wall or foundation edge, and that kind of force rarely resolves on its own.
Width gives you a second data point, and engineers generally break it down this way, based on engineering triage guidance for concrete foundation cracks:
- Very thin hairline cracks are usually low risk and warrant watching.
- Small cracks require monitoring over time to detect growth.
- Moderate cracks should receive a professional assessment.
- Wide cracks or those easily admitting a credit card edge are high risk and need prompt attention.
- Any horizontal crack is critical and requires immediate evaluation.
Displacement matters too. If one side of the crack sits higher than the other, or if the crack tapers from wide to narrow along its length, that’s a sign of movement rather than simple shrinkage. Slab-on-ground performance research notes that some cosmetic distress is normal even in well-built slabs on expansive soils, which is exactly why measured evaluation beats eyeballing.
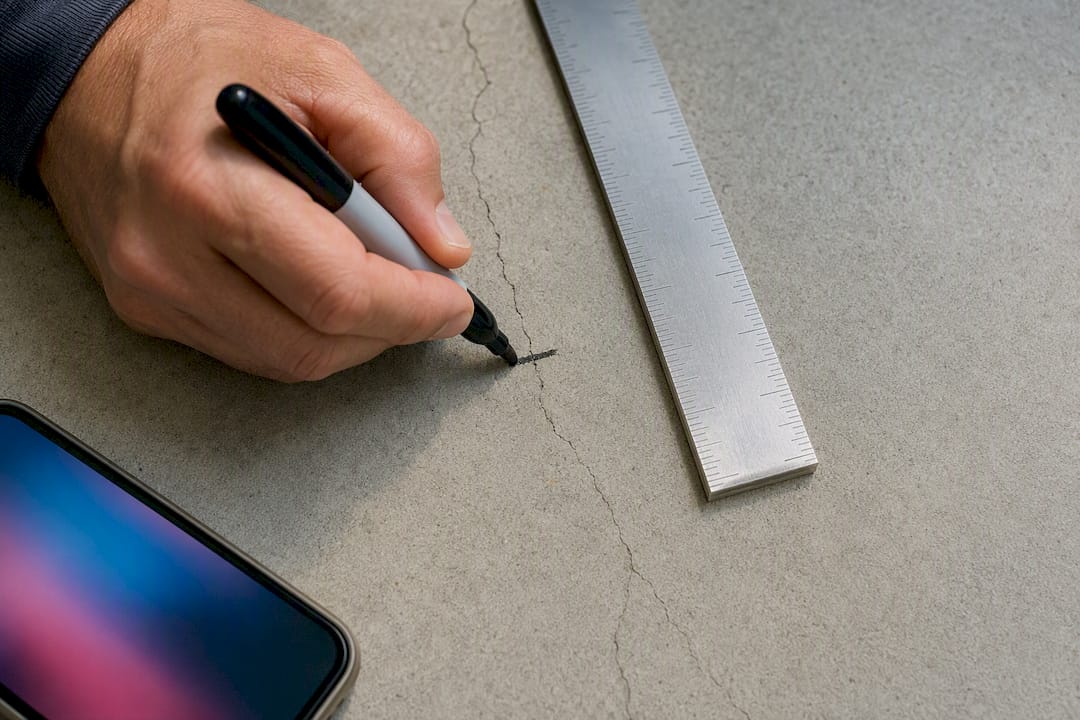
Pro Tip: Draw a hash mark across the crack with a permanent marker, snap a dated photo next to a ruler, and check it monthly. If the hash marks separate, the crack is active, not just old damage.
If you’ve only got a fine hairline crack and want a fast checklist before deciding anything else, these five checks for hairline foundation cracks will tell you whether you’re in safe territory.
What Causes Slab Cracks (and Why It Changes the Fix)
The cause of a crack determines whether sealing it fixes the problem or just hides it. Get this wrong and you’ll pay for a repair that fails within a year.
Concrete slabs crack for a handful of distinct reasons, and engineering sources trace most of them back to three forces: soil bearing failure, hydrostatic or frost pressure, and shrinkage during curing.
- Plastic and drying shrinkage: Happens as concrete cures and loses water volume; produces thin, random hairline cracks that are almost always cosmetic.
- Differential settlement: One section of the slab sinks faster than its neighbor because the soil underneath compacts unevenly; produces diagonal or stair-step cracks and calls for underpinning, not caulk.
- Hydrostatic pressure: Groundwater pushes against the slab edge or beneath it, often after heavy rain; needs a drainage fix, not just a patch.
- Frost heave: Freeze/thaw cycles push soil (and the slab above it) upward unevenly; common in regions with hard winters.
- Poor subgrade prep or missing control joints: If the ground wasn’t compacted properly before the pour, or joints weren’t spaced to control where concrete cracks, random cracking follows almost immediately.
Concrete expands and contracts with temperature changes at a very small rate of about 5.5 millionths per degree Fahrenheit. Over a long, uninterrupted slab, that constant flexing without control joints is enough to crack even properly mixed concrete according to research on structural concrete cracking patterns.
Seal a shrinkage crack and you’re done. Seal a settlement crack without addressing the soil underneath, and it reopens within a season.
How to Inspect and Monitor a Crack Before Calling a Pro
Walk your slab with a flashlight and check the garage floor, the perimeter foundation beams, interior slabs near plumbing runs, and any spot where you’ve noticed staining or dampness. Water stains near a crack usually mean hydrostatic pressure is already at work.
- Measure the width with a ruler or, for a fast field test, a credit card edge (roughly 0.03 inches, or about 0.8 mm thick). If the edge slides in freely, you’re past the low-risk range.
- Mark it with a hash line across the crack in permanent marker so future movement is visible at a glance.
- Photograph it with a timestamp and a ruler in frame for scale.
- Recheck on a schedule: at 1 month, 3 months, 6 months, and 12 months, following the hash-mark monitoring method inspectors rely on.
- Note any functional symptoms alongside the crack: sticking doors, gapping baseboards, or a floor that feels sloped underfoot.
A professional doing the same inspection will add measured point elevations across the slab, moisture readings near the crack and a look at exterior grading and drainage before offering a diagnosis.
Pro Tip: Keep your photo log in one folder, dated. If you ever need a contractor’s opinion, a clean measurement history saves you a second visit and gets you a faster, more accurate quote.
Repair Options for Slab Cracks, Cause by Cause, With Cost Ranges
The fix has to match the cause, or you’re just paying to redo the same repair later.
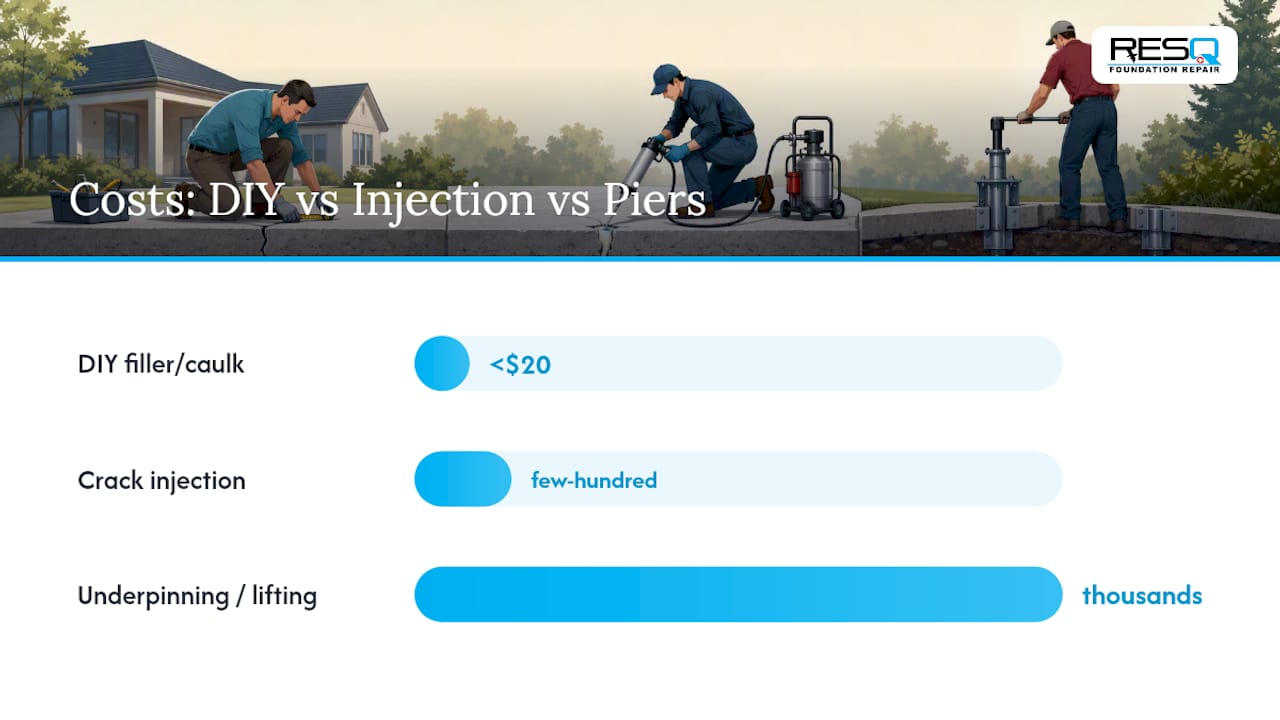
- DIY concrete filler or caulk: Fine for stable, cosmetic hairline cracks that have shown zero movement over several months of monitoring. Costs under $20 for a tube, but it does nothing for an active or widening crack.
- Epoxy injection: A rigid bond for cracks that have stopped moving and just need structural reconnection. Not the right call for a crack that’s still leaking or shifting.
- Polyurethane injection: Stays flexible after curing, which makes it the better pick for active or leaking cracks, since polyurethane accommodates ongoing minor movement where epoxy cannot.
- Slab jacking or foam lifting: Raises a sunken section of slab back toward level by injecting material underneath it; addresses settlement rather than just the visible crack.
- Underpinning with piers: Helical or push piers transfer the slab’s load down to more stable soil; the go-to fix for genuine differential settlement.
- Drainage correction: French drains, regraded soil, or extended downspouts, used when hydrostatic pressure is the root cause rather than the slab itself.
- Slab replacement: Reserved for slabs with extensive cracking, severe displacement, or damage beyond what injection or leveling can address.
Costs vary widely by region and severity, but documented repair guidance puts crack injection typically in the few-hundred-dollar range per crack, while underpinning and slab lifting run into the thousands depending on the number of piers or the square footage lifted. If you want a fuller cost breakdown before you get quotes, this cost guide for foundation crack repair walks through the ranges in more detail, and the concrete leveling process itself is explained in this guide to what concrete leveling involves.
A red flag worth remembering: a contractor who proposes underpinning before measuring anything, or before checking your drainage, is skipping the diagnosis step that determines whether piers are even the right tool.
Simple Steps That Lower Your Risk of New or Worsening Cracks
Water is the single biggest driver of slab foundation problems, and most prevention comes down to keeping it away from the base of your home.
- Grade the soil so it slopes away from the foundation, and extend downspouts at least 5 to 6 feet from the wall.
- Clean gutters regularly so overflow doesn’t pool right at the slab edge, since drainage control is consistently cited as the most effective prevention step.
- Keep heavy equipment, stockpiled materials, and new tree plantings away from the slab perimeter; both added load and root growth disturb the soil underneath.
- For future pours, insist on proper subgrade compaction, correctly spaced control joints, and adequate curing time before load is placed on the slab.
What to Expect During a Professional Slab Inspection
A real diagnostic visit goes past a visual check. Expect a technician to measure crack width and any point-to-point elevation differences across the slab, check for moisture near the crack, and walk your exterior grading and drainage setup before naming a cause.
Before that visit, gather:
- Your photo log with dates and ruler-scale shots
- Written measurements from your hash-mark checks
- Notes on any known plumbing leaks or recent grading, landscaping, or drainage changes near the slab
That paper trail turns a guess into a diagnosis, and it’s the difference between a quote based on evidence and one based on a quick walk-through. For homeowners weighing whether to bring in a contractor or an engineer, this guide to foundation repair contractors covers what each professional actually evaluates.
A Conservative Approach Pays Off More Often Than Not
Homeowners lose money by skipping the monitoring step and jumping straight to a big-ticket fix. Document the crack, watch it for a real interval, and only sign a contract once someone has told you the cause, not just the symptom. Catching a drainage problem or minor settlement early, before it spreads, is almost always cheaper than reacting after the damage widens.
— Kayle
How Foundationresq Approaches Slab Crack Diagnosis and Repair
If you’ve measured, photographed, and monitored a crack and it’s still growing, the next move is a real inspection rather than another round of guessing. Free inspections are offered, and the visit follows the same measurement-led approach this guide walks through: crack width and elevation checks, moisture readings, and a look at your drainage before anyone recommends a fix.

Depending on what that inspection turns up, the right repair might be a straightforward polyurethane injection, a concrete leveling job to correct a settled slab, or underpinning if the soil beneath your foundation needs real support. Foundationresq’s full services page breaks down each option, and if a bigger repair is on the table, its financing options can spread the cost instead of forcing one lump payment. Start with the free inspection and get an actual diagnosis before committing to anything.
Sources
- What Causes Concrete Foundation Cracks? Engineer’s Guide
- Types of Foundation Cracks Dictionary — Identify, Diagnose & Evaluate
- Cracks in a Concrete Slab: When to Worry & What to Do (2026) | RM4L
- Slab-on-Ground Foundation Performance Evaluation
FAQ
When Should I Worry About a Crack in My Slab Foundation?
Worry when a crack is wider than about 1 mm (roughly a pencil tip), runs horizontally, shows a step or height difference across it, or comes with sticking doors and sloped flooring. Hairline cracks under 0.2 mm are usually just cosmetic shrinkage.
How Can I Fix Cracks in My Slab Foundation Myself?
Stable, non-widening hairline cracks can be sealed with a basic concrete filler or caulk, but any crack that’s actively leaking, growing, or wider than about 1 mm needs professional injection or structural repair instead of a DIY patch.
Does Homeowners Insurance Cover Foundation Crack Repair?
Standard homeowners insurance generally excludes gradual settlement, shrinkage, and soil movement, which cause most slab cracks, though sudden covered events like a burst pipe or specific named perils may trigger coverage. Check your policy’s exclusions before assuming any crack is covered.
How Big Is Too Big for a Foundation Crack?
A crack wider than roughly 3 mm, or one you can slide a credit card edge into easily, falls into the high-risk range and needs a professional look. Any horizontal crack counts as critical regardless of its measured width.