
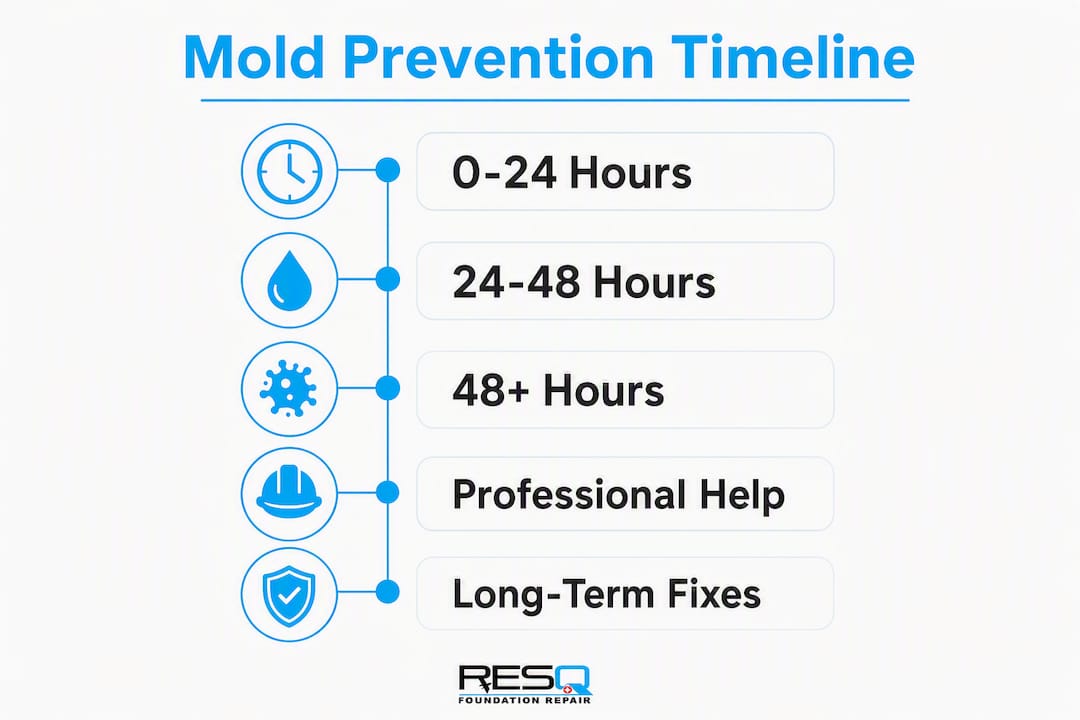
Mold grows after water intrusion because dormant spores, which are present in virtually every home, need only one thing to activate: moisture. The moment water soaks into drywall, wood framing, carpet, or insulation, those spores have everything else they need: organic material for food and temperatures that most homes maintain year-round. According to EPA guidance, drying wet materials within 24–48 hours after a leak or spill will prevent mold growth in most cases. Miss that window and you are no longer preventing mold; you are remediating it.
Here is what to do in the first hours after water intrusion:
- Stop the source first: shut off the supply valve, patch the roof opening, or call a plumber before anything else.
- Remove standing water immediately using a wet/dry vacuum or pump.
- Start drying with fans and dehumidifiers as soon as the area is safe to enter.
- Document everything with timestamped photos and moisture readings before you move or discard any material.
Table of Contents
- Why mold grows after water intrusion: the 24–48 hour window
- What mold actually needs to grow in your home
- First actions after water intrusion: safety, containment, and documentation
- How to dry a wet area properly: methods, targets, and timelines
- What to clean, what to throw away, and how to do it safely
- When should you call a professional remediation contractor?
- Long-term fixes that actually stop recurrence
- How to confirm drying and watch for recurrence
- Key Takeaways
- What the 48-hour rule really means for homeowners
- Foundationresq can help you stop mold at the source
- Useful sources
- FAQ
Why mold grows after water intrusion: the 24–48 hour window
Most people picture mold as something that takes weeks to appear. The biology tells a different story. Germination can begin within hours after spores contact free water, and visible colonies often show up within 24–72 hours depending on the species and the material involved.
| Time after water intrusion | What is happening | What you should do |
|---|---|---|
| — | Water saturates porous materials; spores contact free moisture | Stop the source; remove standing water |
| — | Spore germination begins at the material surface | Extract water; run air movers and dehumidifiers |
| 24–48 hours | Hyphal threads extend into material; growth is microscopic but active | Continue drying; check hidden cavities; document moisture readings |
| 48–72 hours | Visible colonies may appear on drywall, grout, and wood | Assess whether professional help is needed; do not disturb visible growth without PPE |
| Week 1–4 | Colonies spread; structural materials begin to degrade; odor intensifies | Professional remediation strongly recommended if visible growth exceeds 10 sq ft |
For severe flooding or water damage that has been standing for more than 48 hours, the EPA recommends consulting a trained restoration professional rather than attempting DIY cleanup. The longer water sits, the deeper it penetrates and the harder it becomes to dry hidden cavities without specialized equipment.
What mold actually needs to grow in your home
Understanding the conditions for mold growth tells you exactly which lever to pull to stop it. There are four requirements: available spores, a food source, suitable temperature, and moisture. The first three are almost always present indoors. Spores float through every home’s air and settle on every surface. Organic food sources, including the cellulose paper on drywall, wood framing, carpet backing, and insulation, are built into the structure itself. Temperatures between roughly 40°F and 100°F support most common species, which covers every occupied building.
Moisture is the only variable you can actually control.
The key concept here is water activity, not just relative humidity. Water activity describes the amount of free water available at a material’s surface. Most mold species require water activity levels equivalent to material moisture contents at relatively high relative humidity, and serious outbreaks almost always involve porous, cellulose-type materials that have been kept wet by liquid water or sustained condensation. A nonporous tile floor that dries quickly is far less risky than the drywall behind it that absorbed the same water and held it.
Hidden locations are where water intrusion mold growth becomes a serious problem:
- Wall cavities around leaking pipes trap moisture against paper-faced drywall for days without any visible sign.
- Under flooring — especially carpet pads and hardwood subfloors — absorbs water and holds it long after the surface feels dry.
- Crawl spaces with bare earth floors wick ground moisture upward continuously, creating a chronic high-humidity environment.
- Cold corners and thermal bridges behind furniture or at exterior wall intersections condense moisture from indoor air even when no leak has occurred.
Pro Tip: A musty or earthy odor in a room that looks dry is one of the most reliable early signs of hidden mold. Trust your nose before you trust a visual inspection.
First actions after water intrusion: safety, containment, and documentation
Before you grab a mop, check three things that can turn a water damage event into an emergency.
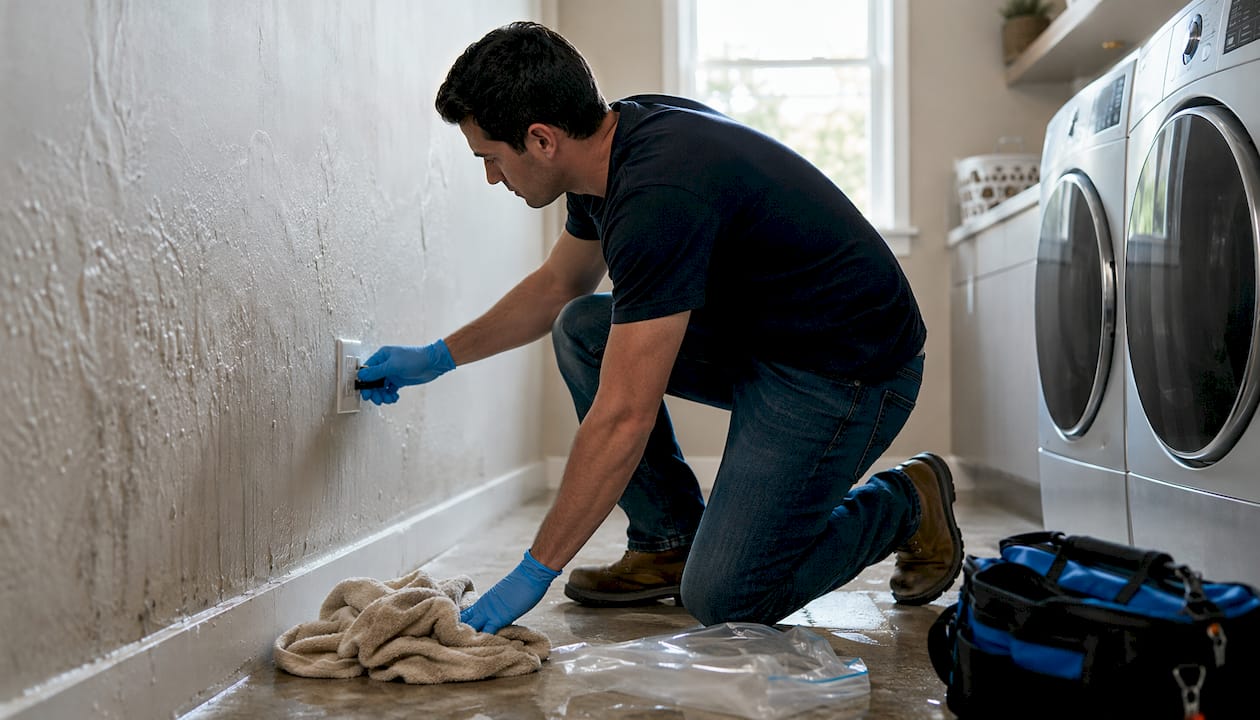
Electricity. Water and live circuits are a fatal combination. If water has reached any outlet, panel, or appliance, shut off the circuit breaker for the affected area before entering. When in doubt, call an electrician.
Sewage contamination. Floodwater that has backed up through floor drains or toilets contains bacteria and pathogens. Do not enter without rubber boots, gloves, and eye protection, and treat everything it touched as contaminated. Professional cleanup is required for sewage exposure, full stop.
Structural risk. Saturated ceilings can collapse. Swollen or buckled floors may not support weight. Walk the perimeter before entering a heavily flooded room and look for visible sagging or cracking.
Once the area is safe, contain the damage. Close doors to unaffected rooms to limit humidity spread. Shut off the water supply if a plumbing leak is the source. If a roof or foundation leak is active and weather is ongoing, temporary tarping or plugging may be necessary before any drying can be effective.
Pro Tip: Before you move a single item, photograph the entire affected area with your phone’s timestamp visible. Capture moisture meter readings on walls, floors, and ceilings. Insurance adjusters and remediation contractors both rely on this documentation, and it is nearly impossible to recreate after cleanup begins.
When to call a professional immediately rather than starting DIY work: sewage exposure, structural damage, water that has been standing more than 24 hours, or any situation where you cannot safely shut off the source.
How to dry a wet area properly: methods, targets, and timelines
Drying is not just running a box fan. Effective drying requires moving air across wet surfaces while simultaneously removing the moisture that evaporates into the air. Here is the equipment hierarchy, from homeowner-rentable to professional-grade:
- Wet/dry vacuum — available at any hardware store; removes standing water before drying begins.
- Axial (box) fans — homeowner-rentable; move surface air but do little for wall cavities or subfloors.
- Air movers (centrifugal blowers) — available at equipment rental shops; direct high-velocity air across surfaces and into cavities far more effectively than box fans.
- Portable dehumidifiers — homeowner-rentable; pull evaporated moisture out of the air; essential alongside air movers.
- Commercial desiccant dehumidifiers — professional-grade; effective in cold conditions where refrigerant dehumidifiers lose efficiency.
- Truck-mounted drying systems — professional-grade; used for large-scale or severe water damage events.
Moisture targets to hit before you stop drying:
The EPA recommends keeping indoor relative humidity between 30–50%, with a hard ceiling of 60% to prevent mold growth. For building materials, the goal is returning them to their pre-loss moisture content, which professionals verify with a moisture meter rather than by feel.
Typical drying timelines vary significantly by assembly:
- Open rooms with hard flooring: 2–3 days with proper equipment.
- Carpeted rooms typically require several days to dry, though carpet pads frequently need removal and replacement.
- Wall cavities require multiple days to dry fully; professionals often use specialized methods to verify drying.
- Insulation commonly requires removal once saturated, as it is difficult to fully dry or clean.
Hidden moisture behind drywall and under flooring is the most common reason DIY drying fails. A surface that feels dry to the touch can still register 20–30 percentage points above normal on a moisture meter. Professionals use both moisture meters and thermal imaging cameras to find these pockets before they become mold colonies.
What to clean, what to throw away, and how to do it safely
Not every wet material can be saved. The decision comes down to porosity and how long the material was wet.
| Material | Decision | Rationale |
|---|---|---|
| Drywall (wet >48 hours) | Discard | Paper facing absorbs water; mold grows inside the material, not just on the surface |
| Drywall (wet <24 hours, dried quickly) | Clean and monitor | Surface mold possible; wipe with detergent solution and verify drying |
| Wood framing (structural) | Clean and dry if possible | Structural removal is costly; HEPA-vacuum, apply antimicrobial, monitor moisture |
| Insulation (fiberglass batts or blown-in) | Discard | Cannot be effectively dried or cleaned; retains moisture and mold |
| Carpet and pad | Discard pad; assess carpet | Pads are not salvageable; carpet may be cleaned if dried within 24 hours and not sewage-contaminated |
| Upholstered furniture | Discard if wet >48 hours | Deep saturation makes complete drying nearly impossible |
| Hard flooring (tile, vinyl) | Clean | Nonporous; clean with detergent and dry thoroughly |
Step-by-step cleaning checklist for salvageable surfaces:
- Put on PPE: N95 respirator or better, nitrile gloves, and eye protection.
- Ventilate the space by opening windows and running exhaust fans directed outside.
- HEPA-vacuum loose debris and surface mold before applying any liquid.
- Scrub with a detergent and water solution; physical removal of mold is more important than the cleaning agent.
- Rinse and dry completely before closing the space.
The bleach myth: Bleach kills surface mold on nonporous materials like tile and glass, but it does not penetrate porous surfaces. On wood or drywall, bleach’s water content can actually add moisture to the material. For porous surfaces, detergent and thorough drying are more effective than bleach. Professionals typically use EPA-registered antimicrobial agents formulated for building materials, not household bleach.
When should you call a professional remediation contractor?
Some water damage events are genuinely DIY-manageable. Others are not, and misreading the line costs far more in the long run. Call a professional when any of the following apply:
- Visible mold covers more than 10 square feet (roughly a 3×3 foot area).
- The HVAC system was exposed to floodwater or shows signs of mold in ducts or air handlers.
- The water source was sewage or contaminated floodwater.
- Structural materials (floor joists, wall framing, roof sheathing) show signs of damage or rot.
- Mold has returned after a previous DIY cleanup attempt.
- Water was standing for more than 48 hours before drying began.
Professional remediation typically includes physical containment of the affected area with plastic sheeting and negative air pressure, commercial-grade drying with moisture verification, HEPA air filtration to capture airborne spores, antimicrobial treatment of structural surfaces, demolition and replacement of unsalvageable materials, and written documentation for insurance claims. Understanding what the mold remediation process involves before you hire helps you ask the right questions and evaluate quotes accurately.
Cost and timeline vary based on the size of the affected area, the materials involved, whether hidden damage is discovered during demolition, and the severity of contamination. A small bathroom leak caught early may cost a few hundred dollars. Extensive crawl space or basement mold following a flood can run into the thousands, particularly when structural repairs are needed alongside remediation.
Long-term fixes that actually stop recurrence
Cleaning mold without fixing the moisture source guarantees it comes back. The EPA is explicit on this point: if you clean up the mold but do not fix the water problem, the mold problem will most likely return. Long-term prevention means addressing the building envelope and drainage systems that allowed water in.
Common permanent fixes include:
- Exterior grading corrections to direct surface water away from the foundation rather than toward it.
- Gutter and downspout repairs so roof runoff discharges at least 6 feet from the foundation.
- Window and door flashing replacement to stop rainwater from entering wall cavities.
- Basement waterproofing using interior drainage systems, exterior membrane coatings, or both.
- Crawl space encapsulation with a heavy-duty vapor barrier to block ground moisture from entering the building.
- Sump pump installation or repair for basements and crawl spaces with chronic groundwater intrusion.
- Whole-space dehumidification systems for crawl spaces or basements that remain humid even after waterproofing.
When vetting a contractor for any of these repairs, ask these questions before signing:
- What moisture testing will you perform before and after the work?
- What warranty do you offer, and does it cover both materials and labor?
- What remediation protocol do you follow, and is it consistent with EPA or IICRC standards?
- Will you provide before-and-after moisture meter readings in writing?
Pro Tip: Request moisture-meter readings and photographs at the start and end of any remediation or waterproofing project. That documentation is your proof of performance for warranty claims and your evidence for insurance if a related problem surfaces later.
Moisture problems can stem from roof leaks, plumbing failures, poor drainage, HVAC issues, and vapor barrier errors, and fixing only one source when multiple exist will leave you back where you started.
How to confirm drying and watch for recurrence
Remediation is not finished when the visible mold is gone. It is finished when moisture levels are back to normal and stay there. Use this monitoring checklist after any water damage event:
- Day 1–3: Check moisture meter readings on affected walls, floors, and ceilings daily. Target readings should match unaffected areas of the same material.
- Day 7–14: Revisit wall bases, insulation edges, and subfloor areas. These dry last and are the most common sites of hidden recurrence.
- Week 3–4: Conduct a full visual inspection for new discoloration, staining, or bubbling paint. Check for musty odor, which often precedes visible growth.
- Monthly (first 3 months): Inspect the crawl space and HVAC system for condensation, standing water, or new growth.
- Ongoing: Monitor indoor relative humidity with a digital hygrometer. If readings consistently exceed 60%, a dehumidification system is likely needed.
Evaluating past remediation effectiveness is a skill worth developing, especially if you purchased a home with a prior water damage history. Keep a written remediation log with dates, moisture readings, photographs, and contractor names. That record supports warranty claims, insurance documentation, and future sale disclosures.
Key Takeaways
Mold grows after water intrusion because spores activate the moment moisture contacts organic building materials, and visible colonies can appear within 24–72 hours if drying does not begin immediately.
| Point | Details |
|---|---|
| Act within 24–48 hours | Drying wet materials within this window prevents mold growth in most cases, per EPA guidance. |
| Moisture is the only controllable factor | Spores, food, and temperature are always present indoors; eliminating moisture stops growth. |
| Porous materials are highest risk | Drywall, insulation, and carpet absorb water and cannot always be dried; discard when wet over 48 hours. |
| Call a pro when the threshold is crossed | Visible mold covering a large area, sewage exposure, HVAC contamination, or structural damage requires professional remediation. |
| Foundationresq for permanent fixes | Foundationresq provides crawl space encapsulation, basement waterproofing, dehumidification, and mold remediation in North Florida, South Georgia, and Alabama. |
What the 48-hour rule really means for homeowners
Most articles about mold after water damage treat the 24–48 hour window as a warning label. It is actually a decision point. Once you cross it without drying, you are no longer in prevention mode. You are in damage control.
What gets underestimated is how fast hidden assemblies reach the conditions mold needs. A wall cavity that looks fine from the outside can be sitting at 90% surface relative humidity within hours of a pipe leak, because the drywall paper wicks moisture inward and holds it. The room air might read 55% RH on your hygrometer and feel perfectly normal. The wall behind the baseboard is a different environment entirely.
The other thing most guides skip: cleaning mold without fixing the source is not remediation. It is a temporary cosmetic fix. Foundationresq’s approach to water intrusion mold growth focuses on the structural and drainage corrections that make recurrence unlikely, not just the surface cleanup that makes a room look better for a few months. If you have had mold return after a previous cleanup, the moisture source was never fully addressed.
Foundationresq can help you stop mold at the source
Water intrusion mold is a structural problem dressed up as a cleaning problem. Foundationresq specializes in the fixes that actually prevent recurrence: crawl space encapsulation, basement waterproofing, interior drainage systems, sump pump installation, whole-space dehumidification, and professional mold remediation for North Florida, South Georgia, and Alabama homeowners and property managers.

Every job starts with a moisture inspection that identifies where water is entering and what it has already damaged. You get before-and-after moisture readings in writing, a clear scope of work, and financing options if the repair scope is significant. No guesswork about whether the problem is solved.
- Crawl space encapsulation and crawl space waterproofing to block ground moisture permanently
- Basement waterproofing and dehumidification for chronic basement moisture
- Mold remediation following EPA and IICRC protocols
- Foundation repair when settling or cracking is contributing to water entry
To schedule a free inspection or get a quote, visit Foundationresq’s services page or call the Tallahassee office directly. Have your moisture readings, photos, and a description of when the water event occurred ready — it speeds up the assessment significantly.
Useful sources
These are the most authoritative resources for homeowners dealing with water intrusion and mold:
EPA: A Brief Guide to Mold, Moisture and Your Home — The foundational homeowner reference from the U.S. Environmental Protection Agency. Covers the 24–48 hour drying window, hidden mold locations, and when to call professionals. Read it here.
EPA Mold Course Chapter 2 — Deeper technical coverage of moisture sources, RH targets, and how mold damages building materials over time. Useful for understanding why structural repairs matter alongside surface cleanup. Read it here.
FSEC/UCF: Mold Growth — Building-science explanation of water activity, cellulose materials, and why Florida’s climate creates elevated mold risk. Practical for homeowners in hot, humid regions. Read it here.
J.S. Held: Understanding Indoor Mold Growth — Estimating Time of Mold Growth — Explains how mycologists estimate how long a colony has been growing and why visible colony size is not a reliable indicator for homeowners. Read it here.
CDC: Mold Prevention Strategies After Hurricanes and Major Floods — Authoritative guidance on post-flood mold risk, HVAC contamination, and health effects. Particularly relevant for homeowners in flood-prone areas. Read it here.
FAQ
How quickly can mold grow after water intrusion?
Mold spores can begin germinating within hours of contacting free water, and visible colonies often appear within 24–72 hours depending on the species and the material. Drying wet materials within 24–48 hours prevents growth in most cases.
How do you prevent mold from growing after water damage?
Remove standing water immediately, then run air movers and dehumidifiers to bring indoor relative humidity below 60% and return building materials to their normal moisture content. Fixing the moisture source permanently is the only way to prevent recurrence.
What permanently kills mold on building materials?
Physical removal combined with EPA-registered antimicrobial treatment is the professional standard. Bleach kills surface mold on nonporous materials but does not penetrate porous surfaces like wood or drywall, where the mold colony lives inside the material.
When should I hire a professional instead of cleaning mold myself?
Hire a professional when visible mold covers more than 10 square feet, when the water source was sewage or floodwater, when the HVAC system was exposed, or when structural materials show damage. Foundationresq handles all of these scenarios across North Florida, South Georgia, and Alabama.
What are warning signs that mold is still present after cleanup?
A persistent musty or earthy odor is the most reliable indicator. Other signs include recurring discoloration on walls or ceilings, bubbling or peeling paint, elevated moisture meter readings, and allergy-like symptoms that improve when you leave the building.
Recommended
- Mold After a Leak? How to Tackle Crawl Space and Basement Mold Yourself – Tallahassee Foundation Repair | Foundation ResQ
- White Mold on Wood in Crawl Space: Identification, Risks, and Solutions for 2026
- Mold Removal Methods Compared: What Actually Works – Tallahassee Foundation Repair | Foundation ResQ