
Most basement floor cracks fall into one of two categories: normal concrete shrinkage from the curing process, or signs that soil movement, drainage failure, or hydrostatic pressure is actively working against your slab. The difference matters enormously for what you do next.
The short version: Most basement slabs are non-structural floating slabs of typical residential thickness. A hairline crack that appeared shortly after the pour and hasn’t changed is almost certainly cosmetic. A crack that’s widening, leaking water, or aligning with wall cracks is a different problem entirely.
Quick checklist before you read further:
- Photograph the crack today and write the date on the image file
- Measure the width at its widest point with a quarter or a ruler
- Note whether moisture appears after heavy rain or snowmelt
- Look for any vertical step or one side sitting higher than the other
- Call a professional if any red flag below applies
Pro Tip: Mark both ends of a crack with a pencil and the date. Check it again in 30 days. A crack that hasn’t moved is almost always stable.
Table of Contents
- Why basement floor cracks appear: the main causes
- What the crack pattern is telling you
- How to assess severity and decide what to do next
- Which repair approach fits your situation
- What repairs typically cost
- How to prevent future basement floor cracks
- What a professional inspection actually covers
- Key Takeaways
- The part most homeowners get wrong
- Foundationresq can help you figure out what you’re dealing with
- Useful sources
- FAQ
Why basement floor cracks appear: the main causes
Understanding the cause is the fastest way to judge urgency. Here are the primary drivers, roughly in order of how often they show up.
-
Concrete shrinkage during curing — Fresh concrete loses moisture as it hardens, and that volume loss creates tension. Because concrete’s tensile strength is low, drying shrinkage almost always produces some cracking, typically within the first few months after the pour. Hairline cracks that appear early and stay narrow are the most common result.
-
Excessive water in the mix — When workers add water on-site to make concrete easier to pour, they weaken it. A high water-to-cement ratio increases shrinkage and creates capillary pathways that draw moisture into the slab for years afterward.
-
Poor subgrade compaction — If the soil beneath the slab wasn’t properly compacted before the pour, voids develop over time. The slab bridges those voids until it can’t, then cracks under its own weight. Settlement cracks typically appear months to years after construction.
-
Expansive soils — Clay-heavy soils absorb water and swell, then shrink when they dry. That repeated push-and-pull exerts uneven pressure on the slab from below, often producing wider cracks or sections that shift relative to each other.
-
Hydrostatic pressure — When the water table rises beneath a slab, upward pressure forces water through any available path. Sealing one crack often fails because water simply finds another route unless the drainage problem is addressed first.
-
Freeze-thaw cycles — Water that infiltrates a crack expands when it freezes, widening the crack each winter. In climates with hard freezes, this is a reliable escalation mechanism for cracks that might otherwise stay stable.
-
Heavy point loads or construction defects — A steel beam pocket, a column footing placed too close to the slab edge, or a missed control joint can concentrate stress in one spot and crack the concrete there.
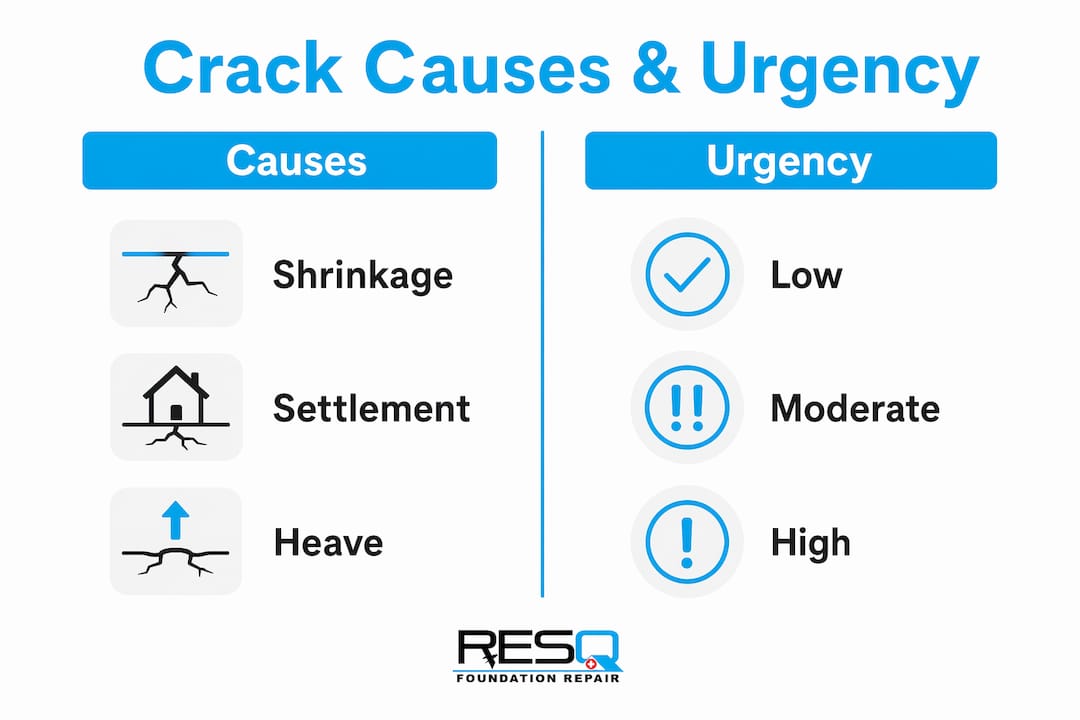
| Cause | Visual clue | Typical urgency |
|---|---|---|
| Shrinkage/curing | Hairline, uniform width, no moisture | Low — monitor |
| Poor compaction/settlement | Single straight crack, slight step | Medium — monitor closely |
| Expansive soils | Wide crack, seasonal change in width | Medium-high — investigate |
| Hydrostatic pressure | Wet crack, efflorescence, recurring leak | High — drainage fix needed |
| Freeze-thaw | Crack widens each spring | Medium — seal and address drainage |
| Heavy load/defect | Crack near column or beam | Medium-high — professional review |
Pro Tip: Check your yard grading. If the ground slopes toward the house, poor drainage is likely contributing to pressure under your slab, regardless of what the crack looks like.
What the crack pattern is telling you
The shape and behavior of a crack often reveals its cause more reliably than its width alone.
Hairline shrinkage cracks are the most common type. They’re typically less than 1/16 inch wide, run in relatively straight lines, and appear within the first year of a home’s life. They don’t leak, they don’t grow, and they don’t indicate structural trouble. The slab is doing exactly what concrete does.
Single straight settlement cracks run across a larger section of the floor and may show a slight vertical offset, meaning one side sits a fraction of an inch higher than the other. That offset is the detail that matters. No offset, no urgency. Any offset at all warrants closer attention.
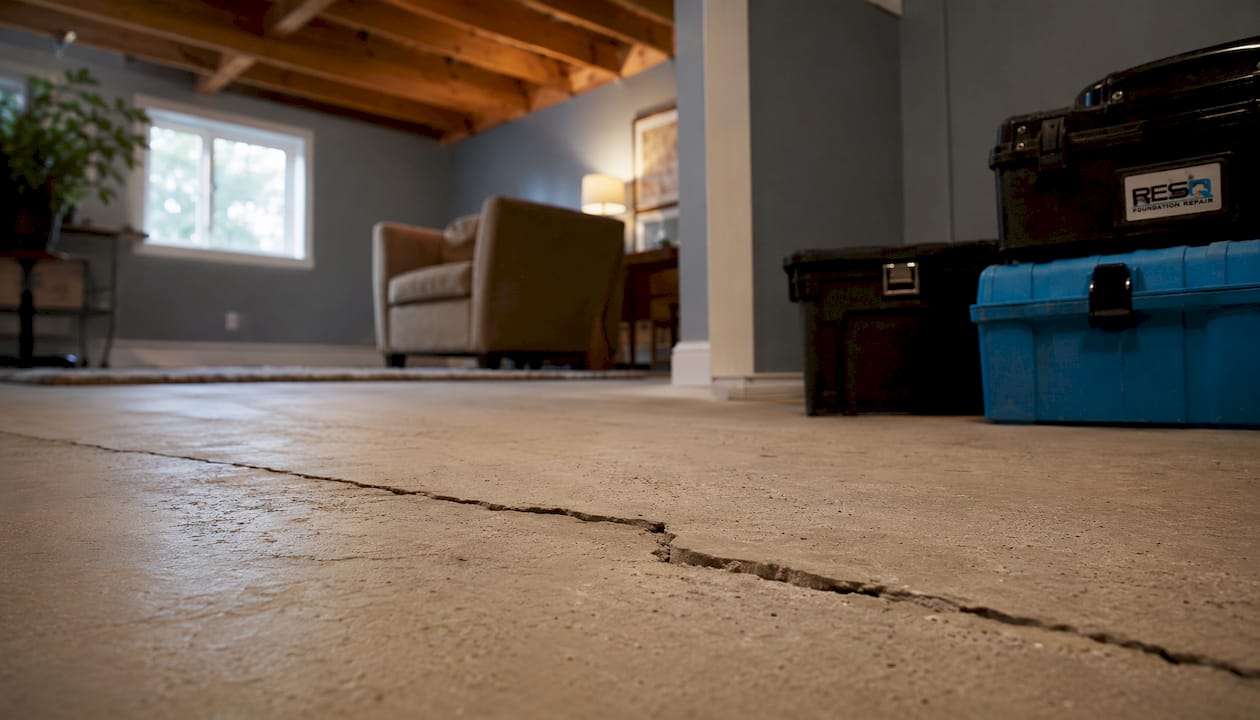
Heave cracks are the opposite of settlement: one section of the slab has pushed upward. Expansive soils and frost heave are the usual culprits. A heaved section creates a trip hazard and signals active soil movement beneath the floor.
Map or spiderweb cracking (also called crazing) covers a broad area in a network of shallow, interconnected cracks. It usually indicates surface shrinkage from rapid drying during the original pour, or a high water-to-cement ratio. Crazing is almost always cosmetic, though it can allow moisture to wick through the surface over time.
Cold-joint cracks appear where two separate concrete pours meet. Cold joints are natural weak points and can allow water infiltration if not sealed. They’re often straight lines running along the perimeter of an addition or a patched area.
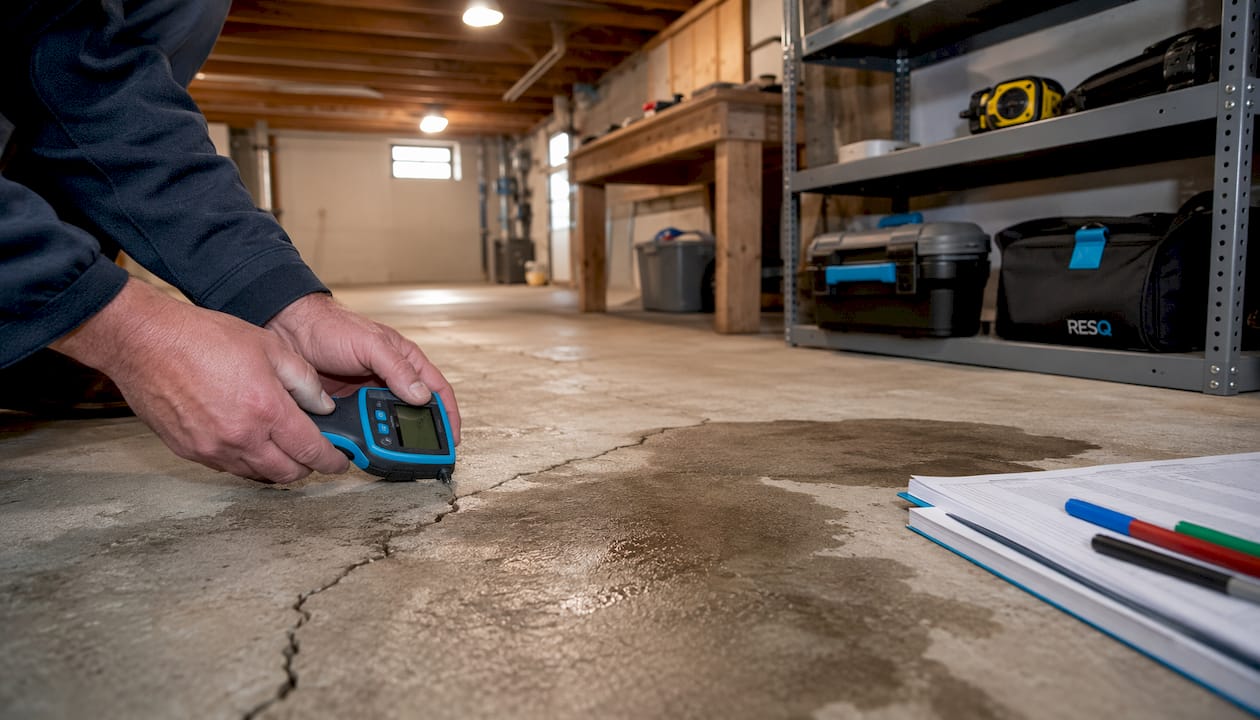
On photographing cracks: Place a coin next to the crack for scale, shoot from directly above, and save the image with the date in the file name. Doing this consistently over 60–90 days gives a professional inspector far more useful information than a single visit ever could.
For a deeper look at how crack orientation changes the urgency picture, the Foundationresq guide on horizontal vs. vertical foundation cracks covers wall cracks alongside floor cracks in useful detail.
How to assess severity and decide what to do next
Not every crack needs a contractor. But some do, and waiting on those is where homeowners get into trouble.
Red flags that require professional evaluation:
- Vertical displacement: one side of the crack sits higher than the other
- Active water flow through the crack, especially after rain
- The crack aligns with a crack in the foundation wall above it
- The crack has visibly widened over weeks or months
- A section of the floor feels soft, bouncy, or uneven underfoot
- Tipped or heaved floor areas that create a slope you can feel when walking
If none of those apply, here’s a practical monitoring plan:
- Photograph the crack with a coin for scale and note the date.
- Measure the width at two or three points and write those numbers on a sticky note taped nearby.
- Check for moisture along the crack after the next heavy rain.
- Revisit in 30 days. Measure again. If nothing has changed, check again at 60 days.
- If the crack is stable and dry at 60 days, it’s almost certainly a cosmetic shrinkage crack.
- If it has grown even slightly, or if moisture appeared, schedule a professional inspection.
For temporary management of a dry, stable shrinkage crack, a flexible polyurethane caulk applied to the surface can keep dust and debris out. Don’t use rigid cement patching compound on any crack that might still be moving, and don’t apply any sealant to a crack that’s actively leaking. Surface patches fail quickly when hydrostatic pressure is the underlying cause.
Pro Tip: ASHI advises inspectors to photograph and document all cracks and recommend a structural engineer for conclusive assessment, because much of the relevant damage starts out of sight. Apply the same standard to your own documentation.
Which repair approach fits your situation
The right repair depends entirely on the cause, not just the crack’s appearance.
DIY-appropriate situations:
- Stable, dry hairline shrinkage cracks with no offset and no moisture history
- Surface crazing with no active leaks
- Cold-joint seams that are dry and haven’t moved
For these, a flexible polyurethane or epoxy crack filler applied per the manufacturer’s instructions is a reasonable solution. Clean the crack thoroughly, let it dry completely, and apply in one pass.
When professionals are needed:
- Any crack with active water infiltration
- Cracks showing vertical displacement
- Progressive widening months after the concrete cured
- Any crack that has failed a previous repair
The most common DIY mistake: applying a surface patch to a pressure-driven leak. The patch pops out within a season because the slab keeps moving and the water keeps pushing. Silicone caulk has the same problem — it doesn’t bond well to concrete and won’t seal the pathway beneath the crack. Fixing the drainage is the repair; the crack fill is just the finish.
Professional repair methods, matched to cause:
- Epoxy or urethane injection — Fills the crack under pressure, bonding the slab back together. Best for stable cracks where the cause has been resolved.
- Interior drain systems — A channel cut along the perimeter of the floor collects water before it reaches the surface. Addresses hydrostatic pressure at the source. Pairs with a sump pump.
- Slab jacking / concrete leveling — Foam or grout is injected beneath a sunken section to lift it back to grade. Appropriate for settlement without structural foundation failure. Foundationresq’s concrete lifting and repair page explains when this is preferable to full replacement.
- Exterior drainage and waterproofing — Excavating around the foundation to install drainage membrane and drain tile. The most thorough solution for chronic hydrostatic pressure, and the most expensive.
- Underpinning — Used when the foundation itself has moved. Helical piers or push piers are driven to stable soil to stabilize and sometimes lift the structure. This is a last resort for severe settlement.
What repairs typically cost
Costs vary significantly by region, scope, and cause. These are ballpark ranges based on commonly reported figures for U.S. markets.
| Repair type | Typical range | Key variable |
|---|---|---|
| DIY crack filler (hairline) | $10 | Product type |
| Professional epoxy/urethane injection | $300 and up | Crack length and depth |
| Interior drain system + sump pump | — | Basement perimeter length |
| Slab jacking / concrete leveling | — | Area and lift required |
| Exterior waterproofing | — | Depth and linear footage |
| Underpinning (per pier) | — | Soil depth, pier count |
Main cost drivers:
- Whether the cause is cosmetic shrinkage or active hydrostatic pressure
- Crack length, depth, and number of locations
- Whether drainage work is required alongside the crack repair
- Basement accessibility and finished vs. unfinished space
- Local labor and material costs
Pro Tip: Get at least three written estimates and ask each contractor to separate the waterproofing scope from any structural work in the quote. A single bundled number makes it impossible to compare bids or understand what you’re actually paying for.
How to prevent future basement floor cracks
Most pressure-driven cracking is preventable with consistent exterior maintenance. Shrinkage cracks on new pours are harder to eliminate entirely, but good construction practice reduces them significantly.
Drainage and grading (highest priority):
- Grade soil away from the foundation at a slope of at least 6 inches over 10 feet
- Clean gutters twice a year and extend downspouts at least 6 feet from the foundation
- Redirect any yard irrigation that currently runs toward the house
- Install or service a sump pump before the spring snowmelt season
Moisture control inside the basement:
- Run a dehumidifier to keep relative humidity below 60%. Foundationresq’s basement dehumidification service addresses chronic moisture that a portable unit can’t handle alone.
- Check the sump pump discharge line each spring to confirm it’s clear and draining away from the house
Seasonal checks:
- Spring: Inspect the floor after the first heavy rain. Note any new moisture along existing cracks.
- Summer: Walk the perimeter of the yard and check that grading hasn’t shifted from freeze-thaw or erosion.
- Fall: Clean gutters before leaf season ends and confirm downspout extensions are in place before the ground freezes.
- Winter: If you have a sump pump, test it monthly during freeze periods.
For new concrete pours: Control joints placed every 8–12 feet give the slab a planned place to crack, keeping random cracks from forming elsewhere. Proper curing with wet burlap or a curing compound for at least seven days after the pour reduces shrinkage significantly.
What a professional inspection actually covers
Knowing what inspectors look for helps you prepare and helps you evaluate whether a contractor is being thorough.
What professionals check:
- Crack mapping: location, orientation, width, length, and whether edges are sharp (recent) or rounded (older)
- Vertical displacement at each crack
- Moisture staining, efflorescence, and active seepage
- Foundation wall condition and whether floor cracks align with wall cracks
- Sump pump presence, condition, and discharge location
- Exterior grading and downspout termination points
- Soil type and any visible erosion or settlement near the foundation
What to prepare before the inspection:
- Clear the floor area around visible cracks so the inspector can access them
- Bring your dated photographs and any notes on when leaks occurred
- Note any prior repairs and when they were done
- If you’ve had water in the basement, mark the high-water line on the wall
ASHI’s position on severity calls: Inspectors are trained to document and photograph cracks and recommend a structural engineer for conclusive assessment, because much of the relevant damage starts out of sight. A contractor who declares a crack “definitely fine” or “definitely structural” after a five-minute visual is skipping steps.
For guidance on choosing a qualified contractor, Foundationresq’s page on foundation repair contractors outlines what credentials and process to expect.
Key Takeaways
Most basement floor cracks are cosmetic shrinkage, but displacement, active water, or progressive widening means it’s time to call a professional.
| Point | Details |
|---|---|
| Most cracks are cosmetic | Basement slabs are non-structural floating slabs 3–4 inches thick; hairline shrinkage cracks are normal. |
| Three red flags demand action | Vertical displacement, active water flow, and progressive widening all require professional evaluation. |
| Document before you call | Photograph, measure, and date every crack; 60 days of stable, dry cracks usually confirms cosmetic status. |
| DIY has limits | Surface patches fail on pressure-driven leaks; fixing drainage is the real repair, not filling the crack. |
| Foundationresq | Provides inspections, basement waterproofing, concrete leveling, and interior drain systems for homeowners who need professional assessment. |
The part most homeowners get wrong
The conventional advice on basement floor cracks tends to focus on the crack itself: how wide is it, what shape is it, does it leak. Those details matter, but they’re secondary to one question most homeowners never ask: what is the soil doing beneath that slab?
A crack that looks minor on the surface can be the visible end of a much larger problem, specifically, a subgrade that’s been slowly losing support for years. Conversely, a crack that looks alarming because it’s long or jagged is often nothing more than normal shrinkage in a slab poured during a hot, dry summer. Width and length are poor proxies for urgency.
The more reliable signal is behavior over time. A crack that was there when you moved in and hasn’t changed in three years is almost certainly stable. A crack that appeared six months ago and has grown an eighth of an inch since then is telling you something is still moving. That distinction, stable vs. active, is what should drive your decision to monitor or call a pro. Documentation makes that distinction visible. Without dated photos and measurements, you’re guessing.
Foundationresq can help you figure out what you’re dealing with
Cracks that show any red flag — water, displacement, or growth — deserve a professional set of eyes, not another round of DIY patching. Foundationresq specializes in exactly this situation: diagnosing whether a basement floor crack is cosmetic or the surface sign of a drainage or structural problem, then fixing the actual cause.

Services include basement waterproofing, interior drain systems, concrete leveling, slab jacking, dehumidification, and underpinning for cases where foundation movement is involved. For homeowners concerned about repair costs, financing options are available so the scope of work doesn’t have to be limited by what you can pay upfront. Real repair outcomes are documented in Foundationresq’s case studies for homeowners who want to see results before committing.
Schedule an inspection through the services page and get a clear answer on what your crack actually means.
Useful sources
A note on using these sources: ASHI and InterNACHI guidance is the most reliable starting point for homeowners trying to assess severity. For ambiguous cases, retain your dated photographs and consult a licensed structural engineer before committing to any repair scope.
- ASHI: Basement cracks and leaks — Red-flag criteria and inspection guidance for basement floor and wall cracks.
- ASHI: Managing Risk — Foundation damage — Why inspectors photograph and defer severity calls to structural engineers.
- InterNACHI: Concrete, cracking, and water — How water-to-cement ratio affects shrinkage and long-term moisture pathways.
- ACI 224R-01: Control of Cracking in Concrete Structures — The engineering standard on drying shrinkage and crack control in concrete slabs.
- Done Right Services: When is a slab crack structural? — Practical guidance on progressive widening and cold-joint behavior.
FAQ
When should you worry about a basement floor crack?
Worry when you see vertical displacement (one side higher than the other), active water flow through the crack, alignment with a wall crack, or measurable widening over weeks. Stable, dry hairline cracks that haven’t changed are almost always cosmetic.
How much does it cost to repair a basement floor crack?
Simple professional crack injection starts around $300, while interior drain systems and slab leveling can cost several thousand dollars depending on the scope, the region, and whether drainage work is required alongside the crack repair.
How do you fix a crack in a basement floor?
Stable, dry shrinkage cracks can be filled with a flexible polyurethane caulk as a DIY repair. Cracks with active water, displacement, or a history of failed patches need professional epoxy injection, interior drainage, or slab leveling depending on the underlying cause.
Do basement floor cracks need to be sealed?
Dry, stable hairline cracks don’t strictly require sealing, but a flexible sealant keeps moisture and debris out. Any crack that leaks water should not be surface-sealed without first addressing the drainage problem; sealing alone will fail because hydrostatic pressure will find another path.