
Aim for a slope that gently directs water away from your yard, and near the foundation, follow the commonly accepted standard of about a 6-inch drop over the first 10 feet. Small dips and minor regrading are reasonable DIY projects with hand tools and a weekend of work. Large elevation changes, foundation-adjacent excavation, or drainage tied to structural cracks call for a professional. Start now by grabbing stakes and a line level to find your yard’s high and low points.
TL;DR:
- Correct yard grading requires a gentle slope of about 5% near the foundation, with a 6-inch drop over 10 feet, and 2% to 5% across the rest of the yard.
- Homeowners should mark high and low points, assess soil drainage, and avoid major elevation changes or utility disruptions without professional help.
- Proper subgrade preparation involves loosening compacted soil, layered topsoil of 4 to 6 inches, and an initial water test to ensure proper drainage.
- Regrading is effective for small issues, but large projects or foundation cracks need licensed professionals with engineered plans and waterproofing solutions.
- Always check local permit requirements and plan water flow away from neighbors to prevent disputes and ensure the long-term success of drainage efforts.
Table of Contents
- Why Yard Grading for Drainage Matters (and How to Spot a Problem)
- What Slope Do You Actually Need, and How Do You Measure It?
- Planning Before You Dig: Utilities, Permits, and Your Neighbors
- Tools, Soil, and Getting the Materials Right
- The Step-by-Step Regrading Process
- Finishing the Job: Seeding, Erosion Control, and What to Expect Next
- When Grading Alone Isn’t Enough: Signs You Need a Professional
- What Homeowners Get Wrong About Yard Grading
- How Foundation ResQ Helps When Grading Reveals a Bigger Problem
- Sources
- FAQ
Why Yard Grading for Drainage Matters (and How to Spot a Problem)
Water follows gravity, not wishful thinking. When the ground around your house tilts toward the foundation instead of away from it, that water has nowhere to go but into your crawl space, basement, or slab edge. Over time, saturated soil expands and contracts, and that movement is a major contributor to foundation settling, cracked walls, and long-term erosion around the foundation. Grass stressed by standing water thins out, and bare patches invite more erosion.
You don’t need a soil engineer to spot the warning signs. Watch for these:
- Puddles that sit in the yard for more than 24 hours after rain
- A damp, musty basement or crawl space, especially after storms
- Visible erosion channels or exposed roots cutting across the lawn
- Downspouts dumping water within a few feet of the foundation instead of directing it away
- Mulch or soil washing away from garden beds near the house
If the problem is limited to a few low spots and the rest of the yard slopes correctly, regrading alone usually fixes it. If water is pooling against the foundation from multiple directions, or your soil is heavy clay that barely drains at all, grading needs to pair with a French drain, swale, or catch basin. As the folks at Green Acres point out, grading shapes where water goes, while drainage systems collect and move it. Fix the shape first.
What Slope Do You Actually Need, and How Do You Measure It?
The building code sets the baseline. The International Residential Code requires finished grade to drop by a minimum amount within the first 10 feet away from a foundation wall, which translates to a slope of approximately 5%, and it’s the minimum most inspectors and contractors will check for.
Statistic Callout: A drop of about 6 inches over 10 feet near the foundation equals roughly a 5% slope. Yard drainage tools generally flag anything under 2% slope as poor, meaning water is likely to sit rather than run off.
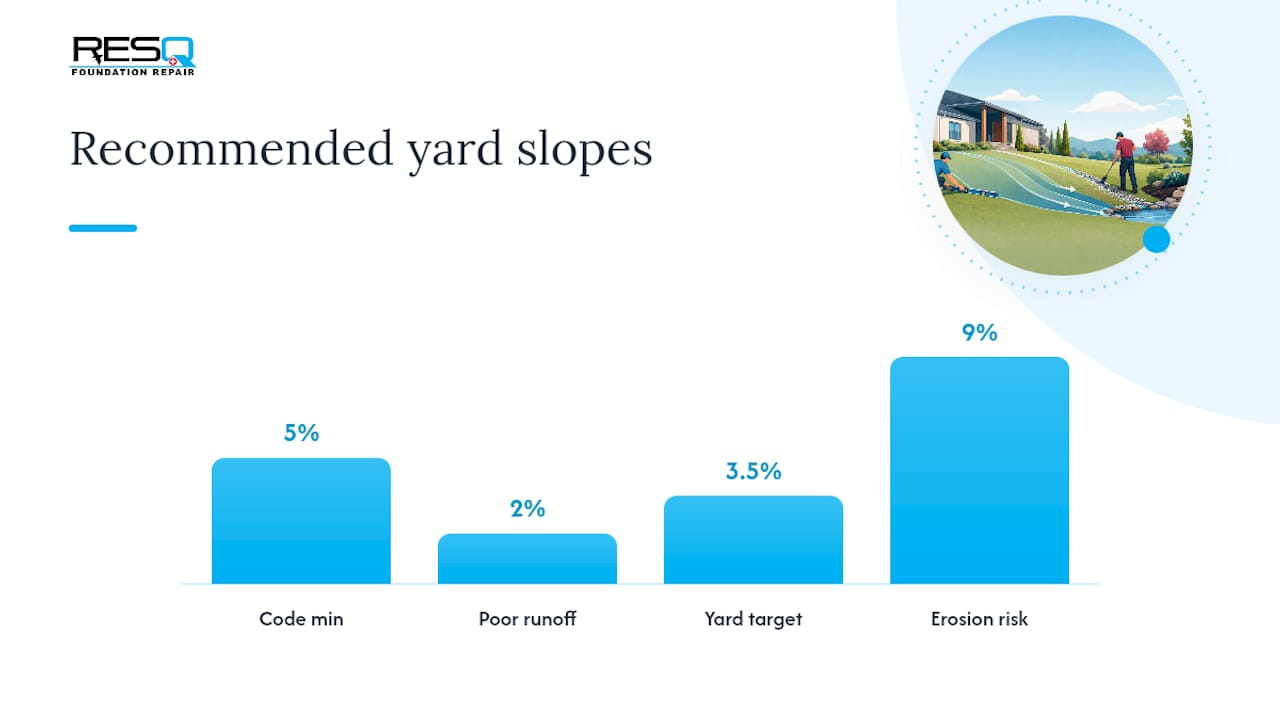
Beyond that critical 10-foot zone, aim for a broader target: 2% to 5% slope across the rest of the yard, based on common yard drainage slope recommendations. Too flat (under 2%) and water lingers. Too steep (over 8% to 10%) and you risk erosion, washed-out mulch beds, and soil creeping onto sidewalks after every storm.
Measuring slope doesn’t require expensive gear. Try one of these:
- Two-stake and string method: Drive a stake at the high point and one at the low point, run a string between them, and use a line level to find level. Measure the drop, divide by the distance, multiply by 100 for percent slope.
- String level or laser level: Faster for longer spans, and laser levels are easy to rent by the day.
- Smartphone level apps: Not as precise, but fine for a rough first pass.
- Simple math check: Divide inches of drop by inches of horizontal run, multiply by 100. A 6-inch drop over 120 inches (10 feet) equals 5%.
Planning Before You Dig: Utilities, Permits, and Your Neighbors
Regrading without a plan is how homeowners end up hitting a gas line or flooding the house next door. Work through these steps before you touch a shovel.
- Call 811 first. This free service marks buried utility lines on your property, and skipping it risks expensive damage and real safety hazards.
- Check your local permit rules. Many cities require a grading permit once you disturb more than a certain amount of area or change elevation beyond a local threshold. Seattle’s grading permit guidance/grading-permit), for example, flags projects disturbing above medium-sized areas or altering grade by more than a few inches. Thresholds vary by city and county, so call your local building department before starting.
- Think about where the water goes next. Redirecting water off your property doesn’t mean the problem disappears. Extension guidance on being a good stormwater neighbor warns against concentrating runoff onto a neighbor’s yard or into a drainage path that wasn’t designed to handle it. Route water toward an approved discharge point, a swale, or your own storm drain connection, not simply over the fence line.
- Notify neighbors if your grading changes shared boundaries. A quick conversation avoids disputes later, especially if your regrade shifts water flow near a shared fence or low spot.
Tools, Soil, and Getting the Materials Right
Most backyard regrading jobs run on a mix of hand tools and short-term equipment rentals. A garden rake, landscape rake, tamper, wheelbarrow, and a flat spade cover minor leveling and touch-up work. For anything moving more than a few cubic yards of soil, especially over a large area, renting a skid steer or mini excavator for a day saves your back and your weekend.
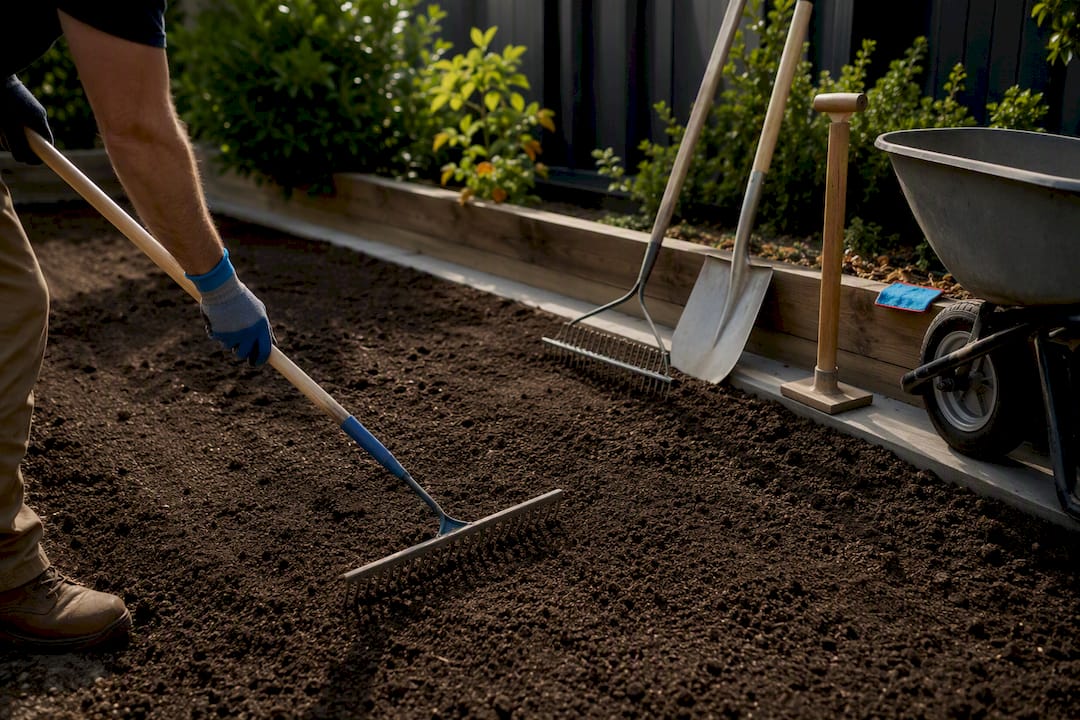
Soil matters as much as the tools. Before adding anything, address the subgrade, meaning the compacted native soil underneath. Persistent damp spots often trace back to compacted clay that won’t let water through, so breaking it up with a rake, tiller, or aerator improves drainage before you add topsoil, echoing standard subgrade preparation guidance from Penn State Extension.
Once the subgrade is loosened, layer in good-quality topsoil:
- Use 4 to 6 inches of topsoil at settled depth, not just as-placed depth.
- Blend the new topsoil into the upper subgrade rather than dumping it in a sharp layer, which creates a gradual transition and better root penetration.
- Avoid dumping in pure sand unless a soil test or landscaper specifically recommends it. Sand alone can create drainage inconsistencies between patches of yard.
Pro Tip: Order 15% to 20% more topsoil than your flat calculation suggests. Loose soil compacts as it settles, so a 6-inch layer today can shrink to 4 inches within a season.
The Step-by-Step Regrading Process
Once utilities are marked and permits are cleared, work through the job in order. Skipping steps is the most common reason DIY regrades fail to hold.
1. Assess and mark. Walk the yard after a rain and note where water pools. Use your two-stake and string setup (or a laser level) to map every high and low point. Push a screwdriver or soil probe into several spots. If it barely goes in, that ground is compacted and needs to be broken up before you add anything. Mark your target grade lines with stakes and mason’s twine so you have a visual reference while you work.
2. Rough grade the subsoil. This is the heavy-lifting phase. Move soil from high points to low points, and rip or till compacted subgrade so water can actually move through it. Don’t build up soil against siding or brick veneer. Keep at least 6 inches of clearance between finished grade and the bottom of siding to avoid moisture wicking into the wall.
3. Add topsoil and fine grade. Spread your 4 to 6 inches of topsoil in layers rather than one thick dump, and drag or lightly roll each layer to firm it without over-compacting. Check your slope with the line level every few passes. This is where most DIY jobs go wrong. Rough grading gets the shape right, but skipping the fine grading check means low spots reappear the first time it rains.
Statistic Callout: Extension guidance recommends a topsoil layer of 4 to 6 inches at settled depth for reliable turf establishment. Skimping below that range is one of the most common reasons new lawns stay patchy over compacted or uneven subgrade.
4. Verify with water, not guesswork. Run a garden hose at the highest point and watch where the water travels. Better yet, check the yard 24 to 72 hours after an actual rainstorm. Any spot still holding water needs another pass with the rake and a little more topsoil.
**5. Large earthwork jobs, meaning more than a few cubic yards moved across a wide area, usually justify renting equipment or hiring it out entirely.
This sequence mirrors the practical DIY approach This Old House recommends: knock down the highs, fill the lows, and check your work constantly rather than trusting a single measurement.
Finishing the Job: Seeding, Erosion Control, and What to Expect Next
Bare, regraded soil is vulnerable until something is holding it in place. Seed works well on gentle, established slopes when you have time for germination; sod gives instant coverage and is worth the extra cost on steeper areas or anywhere erosion is a concern right away.
For any exposed soil, especially on slopes or near swales, add a layer of straw mulch or hydromulch immediately after seeding to hold moisture and prevent the first rain from washing your work downhill. On steeper grades, jute mesh or erosion control netting anchors the soil while grass roots establish, and low-growing groundcover or deep-rooted plantings along a swale add long-term stability once turf alone isn’t enough.
- Straw mulch or hydromulch on freshly seeded, exposed soil
- Jute mesh or erosion netting on slopes steeper than roughly 10%
- Groundcover or native plantings along drainage swales for lasting stabilization
Pro Tip: Walk the graded area after the first heavy rain and again after the first hard freeze/thaw cycle if you live somewhere with real winters. Settling shows up fastest under those two conditions, and it’s much easier to patch a small dip in month two than to regrade the whole area again next year.
Give new topsoil a full season to settle before judging the final grade. Minor dips are normal and easy to top off with a little extra soil.
When Grading Alone Isn’t Enough: Signs You Need a Professional
Some situations are beyond a weekend project, no matter how good your string level game is. Call a professional when you notice:
- Cracks in the foundation wall, especially horizontal cracks or ones wider than a hairline
- Water that keeps returning to the same spot in the basement or crawl space no matter how many times you regrade
- A slope so steep or so large that hand tools and a rented skid steer aren’t realistic
- A need for retaining walls, engineered fill, or compaction testing to meet code
Professional work in these cases usually goes beyond surface shaping. It includes engineered grading plans, soil replacement with verified compaction, exterior or interior basement waterproofing, and coordinated sump pump and catch basin systems that work with your yard’s slope rather than against it.
Before hiring anyone, ask for their license and insurance information, examples of similar grading or waterproofing jobs they’ve completed, and what warranty backs the work. A contractor who can’t answer those three questions clearly isn’t the one for a job this close to your foundation.
What Homeowners Get Wrong About Yard Grading
Grade first, drainage second. That order matters more than most homeowners realize. A French drain installed on top of a bad slope doesn’t fix anything. It just moves water along the same failing path the grade was already creating, an issue worth understanding before you spend money on a drainage contractor who skips the grading conversation entirely.
The mistake I see most often is homeowners adding topsoil without touching the compacted subgrade underneath. That new soil looks great for one season, then settles unevenly and the puddle comes right back. The other repeat offender: fixing your own yard by sending water straight onto a neighbor’s property, which solves nothing and starts a dispute.
Take photos and jot down your measurements before you start. A quick record of where water sat and what slope you measured makes it far easier to diagnose things if a problem resurfaces two years from now.
— Kayle
How Foundation ResQ Helps When Grading Reveals a Bigger Problem
Regrading solves surface water, but sometimes the water damage runs deeper. When regrading hasn’t stopped basement dampness or foundation movement, that’s usually because the water intrusion has already reached below grade.

Foundation ResQ starts with an inspection that identifies whether the issue is still surface level or has moved into structural territory, then walks through a straightforward process: inspection, a written proposal, and repair. That might mean crawl space remediation, exterior or interior waterproofing, or foundation stabilization, depending on what the inspection turns up. If your yard grading checks out fine but the crawl space or basement still shows moisture, that’s the clearest sign the problem has moved past what a shovel and rake can fix, a pattern covered further in common foundation repair mistakes homeowners make.
If you’ve regraded and you’re still seeing water where it shouldn’t be, schedule an inspection with Foundation ResQ to find out what’s actually happening below the surface.
Sources
For homeowners who want to check the source material directly, the IRC finished grade requirement lays out the code minimum near foundations. Penn State Extension’s lawn establishment guidance covers topsoil depth and subgrade prep in more depth than fits here. Seattle’s grading permit guidance is a useful example of permit thresholds, though your own city or county sets the actual rule that applies to you.
FAQ
How much does it cost to have a yard regraded?
Cost depends heavily on yard size, soil condition, and whether heavy equipment is needed. Minor spot regrading with hand tools costs far less than a full-yard regrade requiring rented equipment and multiple truckloads of topsoil.
Can I grade my backyard myself?
Yes, for minor corrections and modest slope adjustments, DIY regrading with hand tools and a line level is realistic for most homeowners. Larger elevation changes, foundation-adjacent work, or anything involving utility lines is safer left to a professional.
What kind of dirt should I use to regrade a yard?
Use good-quality topsoil over a properly prepared subgrade, aiming for 4 to 6 inches of settled depth, and blend it into the existing soil rather than layering it sharply on top. Avoid pure sand unless a soil test specifically recommends it.
Do you need a permit to regrade your yard?
It depends on your city or county. Some jurisdictions require a permit once you disturb more than roughly 500 square feet or change grade by more than 6 inches, so check with your local building department before starting any large regrade.
How do I know if grading alone will fix my drainage problem, or if I need a French drain too?
If water pools in a limited area and the rest of your yard slopes correctly, grading alone usually solves it. If water returns from multiple directions or your soil is dense clay, pair grading with a French drain or swale, since fixing the slope first prevents the drain from failing.